RMA FAQ
RMA item policies let you specify return policies for different items.
For example, you might not allow returns (credit notes) or repairs (replacement orders) for an item. Or, you might allow an item to be returned only within a certain number of days from the invoice date. Then, when you save a credit note or a replacement order that uses the item, the program warns you.
You can email R/A Forms from the R/A Transactions screen and from the R/A Forms menu.
If you choose Customer Delivery Method, and the A/R Customer delivery method is set to "Email (multiple contacts)", RMA emails the form to all active contacts selected for the R/A form.
RMA Processing supports Sage 300's Vendor Number Change, Customer Number Change and Item Number Change modules.
You need to have RMA Processing and the Vendor/Customer/Item Number Change modules installed to the same "Sage Programs" and "SharedData" directories.
This will result in a common "...SharedData\3rdParty" directory with the appropriate files from both RMA Processing and the Vendor/Customer/Item Number Change modules.
30-day Trial Licence
If you don't have an activation code for Orchid Module, you can create a 30-day trial license.
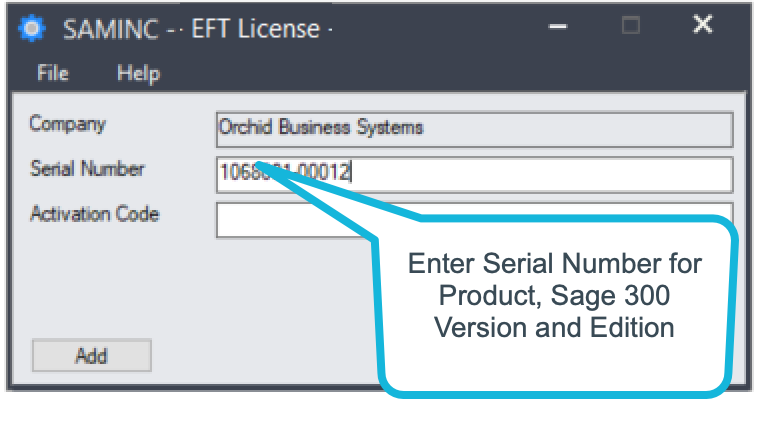
In the License screen, enter a serial number for the module, Sage 300 version and edition you are running.
Click the Add button. This create a 30-day trial license.
Tip: If you install a 30-day trial, enter a valid activation code before the trial expiry date to continue using the application.
Enter a valid serial number - Serial Number depends on Module, Sage 300 Version and Edition.
The example below refers to EFT Processing. When using another module, enter the appropriate Serial Number in the Serial Number field.
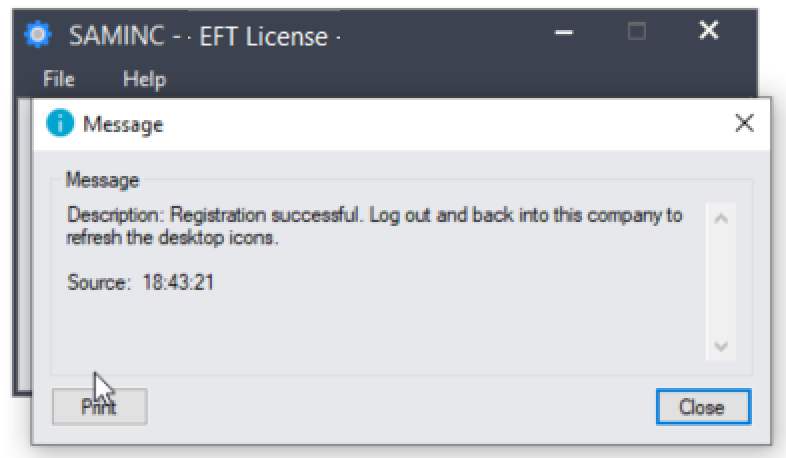
Registration successful message
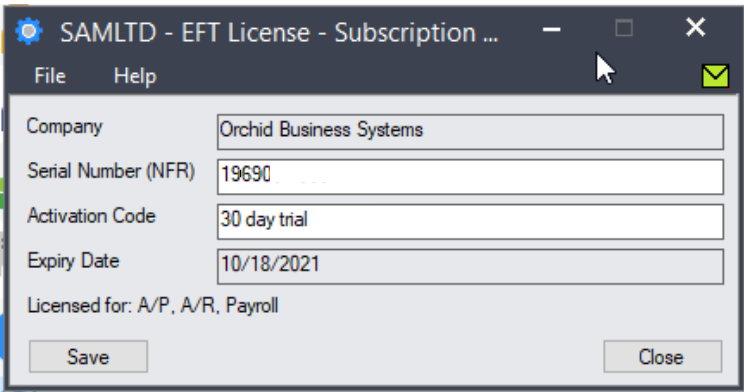
License screen with 30-day trial
*
When an RMA is approved, the validations on the RMA do not apply.
Authorizing RMAs essentially means that the RMA Template validations and Item Policies are suspended for any RMA Document that has been correctly authorized.
For example, a particular user might override the validations configured in RMA Templates and Item policies:
- An invoice number is entered for all items.
- The RMA does not credit more items than were initially sold, less credits already issued.
- The RMA is issued only within x days of the invoice date.
Once the associated document have been generated, the document date and number are stored on the detail line for later reference. The details of last credit note / replacement order and PO Return documents are displayed on the RMA header.
On the F9 Detail Zoom for the RMA Detail Line, select the Integration Tab to drill down to or print the associated document. This applies to all associated documents, O/E Credit Note, O/E Replacement Order and P/O Return.
-
Customer Order Number
-
Customer Order Date
-
Customer Credit Note Number
-
Customer Credit Note Date
-
Vendor Return Number
-
Vendor Return Date
The Customer Templates feature offers the following template settings:
- A default RMA Template Code for the customer
- A default E-mail address
- A default Message ID (linked to an E-mail Message Template)
To create a RMA Customer Template:
- Choose a Customer Code.
- Choose a Template Code. (link to setup Icons > Template Code)
- Enter a description.
- Enter the RMA Customer E-mail address
- Select a default E-mail Message ID (link to setup icons > E-mail messages)
- Click Add or Save.
You can automatically add restocking fees to an RMA if required. Restocking fees can either be a fixed percent, or a percentage of the RMA itself.
Steps to configure Automatic restocking fees:
After completing and creating documents, you may need to amend a RA Line that wasn't used to create associated documents in the first round.
For example, if a detail line does not use the option Put On Credit Note, the line is not included on the credit note. To change this option later:
-
Clear the Complete option for the RMA header
-
Amend the detail line, and
-
Select Complete again for the header,
-
Click Generate CN again to produce an additional credit note.
The RMA Template used when creating the RMA determines whether or not a credit note is applied to an invoice.
-
If you do not want matched Credit Notes, then de-select "Match Credit Note to Invoice" on the associated RMA Template code.
-
If you want Credit Notes to be matched to the associated Invoice, then you need to select both "Match Credit Note to Invoice" and "Invoice is required on all items" for the associated RMA Template Code.
-
If you want only some Credit Notes to be matched and others not, you would need to create two RMA Template Codes and use the appropriate one on each of the documents.
When you use Price check in Inventory Control, you need to enter the User that is authorized to make the price adjustments into the “Authorized By” field on the RMA header before creating the O/E Credit note and replacement order.
When the O/E credit note and O/E replacement order are created, RMA will use the Authorizer’s userid and password (that is saved away in RAAUT) to fill in the required fields on the Order Entry documents (CAPPROVEBY and CAPPRPWORD fields on the document detail lines.).
Note: Authorized to Approve RMAs is not required on the RA Authorizations screen for this process.
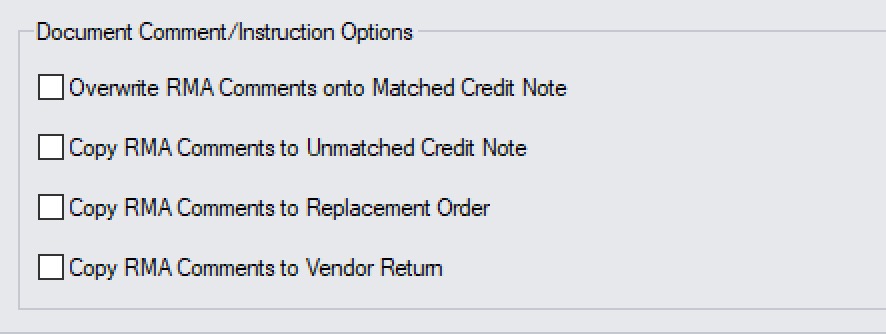
On the RMA Templates > Processing Tab, select Overwrite RMA comments onto Matched Credit Note or Copy RMA Comments to Unmatched credit note to copy the RMA detailed comments and instructions to the Line credit note.
It not selected, no comments will be copied from the RMA to the Credit Note.
Using RMA with Project and Job Costing
Refer to Sage 300 Project and Job Costing documentation for details on Project Setup.
Entering RMA - Job related Tab
Select the Job Related option if this order applies to a project that you are managing using Sage 300 Project and Job Costing.
When you select the option, additional fields appear in the detail-entry grid to let you enter job-related information for each item.
You can also choose:
Retainage accounting, if you invoice the customer for most of the order up-front, and then invoice the remainder of the order after a hold-back period.
Project invoicing, if all of the billing for this order will be handled by the Project and Job Costing module.
Creating documents for job-related RMA details
Job-related RMA details can either be placed onto an Order Entry Credit Note or a Purchase Order Return, but not on both. Therefore, an RMA detail line that has been credited cannot be placed on P/O Return. Conversely, a detail line that has been placed on a P/O Return cannot be placed on an O/E Credit Note.
This is due to automated processing of stock and costs by Project and Job Costing when either a P/O Return or an O/E Credit Note is generated. To allow RMA details to be both credited and returned would result in a duplication of cost and quantity for the project in PJC.
Matching PO Return to PO Receipt
: If the PO Receipt is defined on the RMA Detail line then the PO Return will be matched to the PO Receipt.
If there are multiple PO Receipt numbers on the RMA Detail lines, this means RMA will need to create multiple PO Returns.
If the optional fields configured on RA Header have the same name, type and length as fields in Order Entry and / or Purchase Order, they will be passed through when credit notes and replacement orders are created in Order Entry and to PO Returns when created in Purchase Order.
The main steps for setting up a new Return Material Authorizations system are described below:
Step 1: Gathering Return Material Authorization Data
Step 2: Adding Security Information .
Step 3: Choosing Return Material Authorizations Options
Step 4: Adding Return Material Authorizations Setup Records
Step 5: Entering Outstanding Return Material Authorizations (optional).
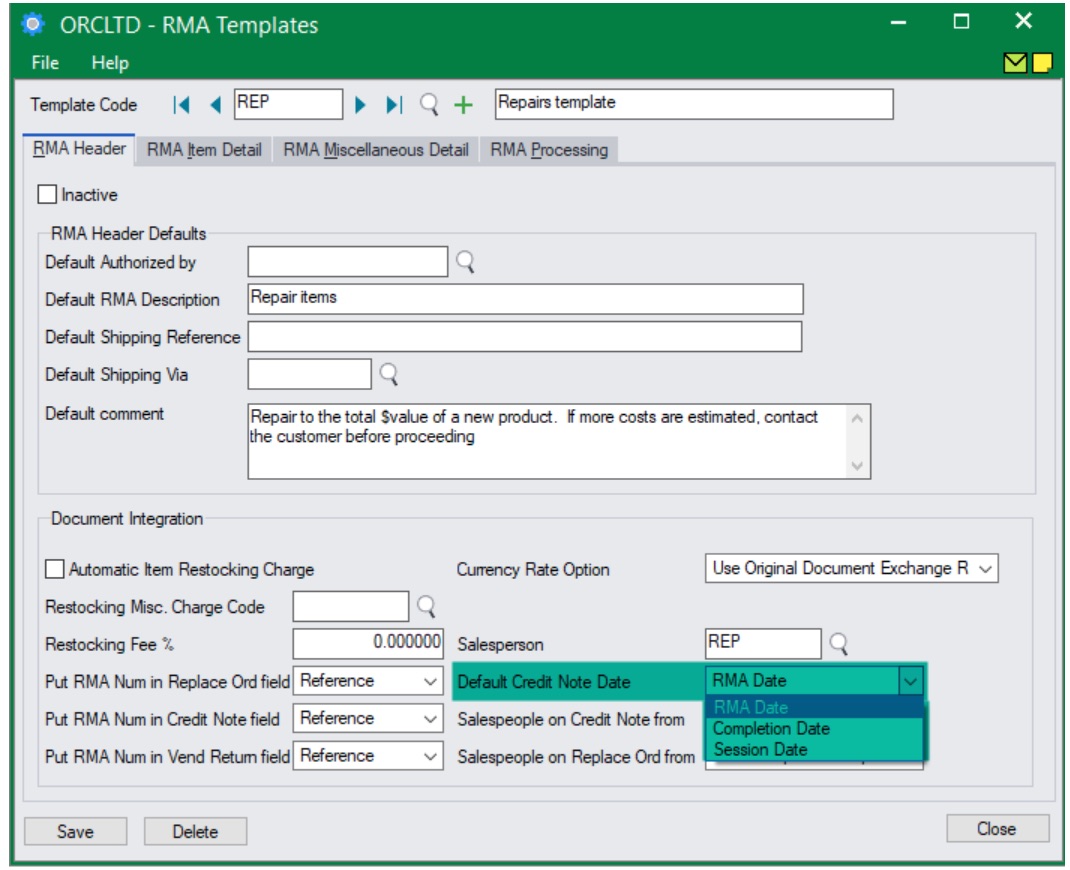
On the RMA Template > Header tab, you can set the Credit Note date:
Use RMA Date, Completion Date or Session Date
Importing Return Material Authorizations
Use the Import and Export commands on the File menu in the Return Material Authorizations Entry form to import and export Return Material Authorizations.
You cannot import OE Replacement Orders, OE Credit notes and PO returns via Return Material Authorizations. However, you can import Return Material Authorizations and then, through the Return Material Authorizations entry screen, create and post OE and PO returns and credit notes utilising the transactions you have just imported.
Key steps:
RMA Document Replacement Order Posting – Lets users create Order Entry orders for RMA documents. You must also assign RMA Document Entry authorization to grant RMA Document Replacement Order Posting authorization. Users also need security rights to create orders in O/E Sage security.
RMA Document PO Return Posting – Lets users create PO Vendor returns in Purchase Order for RMA documents. You must also assign RMA Document Entry authorization to grant RMA Document PO Return Posting authorization. Users also need the security rights to create Purchase Order in P/O Security in Sage 300 Administrative Services.
You can add both Kit Items and Kit Components to an RMA Document.
However, if you are working with a RMA Template that has "Invoice required on all items" selected, then you are unable to add the Kit Component to the RMA as there is no invoice number associated with the components. This is because only the OE Order/Shipment/Invoice only records the Kit item on the Item Detail.
In this case you can add the component(s) that need to be returned/replaced by selecting them from the IC Item list (not from the OE Invoice Item Details), and then you will need to "Authorize" the RMA by keying in a valid RMA User ID and Password who has been configured to be able to "Authorize" RMAs.
Authorizing RMAs essentially means that the RMA Template validations are suspended for any RMA Document that has been correctly authorized.
