Setup Optional Tables
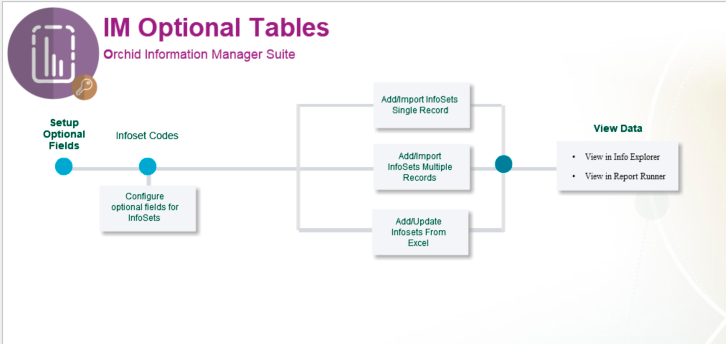
The setup steps are described in the Visual Process Flow (VPF) below followed by detailed steps. To assign VPF, see Assigning Visual Process Flows

1. Store structured data in Optional Tables against any Sage 300 View which does not already have Optional Tables (eg Sales Person) for use in Information Manager Notes or in reporting (eg Info Explorer or Crystal Reports, using I/M Data views to simplify the optional field reporting
2. Store budget data for any Sage 300 View / combination of views (for example a customer and item budget) for use in Information Manager Notes or in reporting. This is generally entered in the Grid or the Excel Addin and used in reports.
You are creating custom data structures within your Sage 300 database (stored in Optional Tables /Infosets).
- Manage KPIs, budgets, forecasts, actual results and non-financial data at any level.
- Report at the level you define with the combination of dimensions and facts you specify, using financial, non-financial and your own custom data.
Key steps to setup Optional Tables
1. Create Optional Fields in Sage 300 Common Services, appropriate to the information you need to track in Optional Tables
2. Use I/M Setup \ Options \ Options Form - Suppl. Data Tab to configure Optional tables. Options Form - Suppl. Data Tab

3. Use I/M Setup\ Optional Tables - Infoset Codes Setup Overview to create the required optional tables, linked to the Sage 300 Screens/View(s) and Optional Fields.
Using Optional Tables information
4.To display the Optional Tables details in a Note for a Sage 300 Screen, you need to configure Information Manager Notes I/M Setup / Options / Notes/DML/Extender Tray tab .
5. Optionally, you can use Information Manager Data Views to include the Optional Tables details in your reporting tool more easily (for example, custom Crystal Reports or Orchid Info Explorer).
5. Enter, import or update Optional Tables Data.
6. Using Optional Tables data in Orchid Info Explorer
