Infoset details and Notes
Configure Notes/DML/Extender Tray to display structured notes in the Alert Tray.
Infoset Notes Setup - Notes/DML/Extender Tray Tab (I/M Options)
Select Infoset Alert Type -Alert Based on structured data / Optional fields setup in Information Manager Optional Tables / Setup / Infoset Codes.
Requirement! Requires Sage 300 Optional Field module and Orchid Optional Tables.
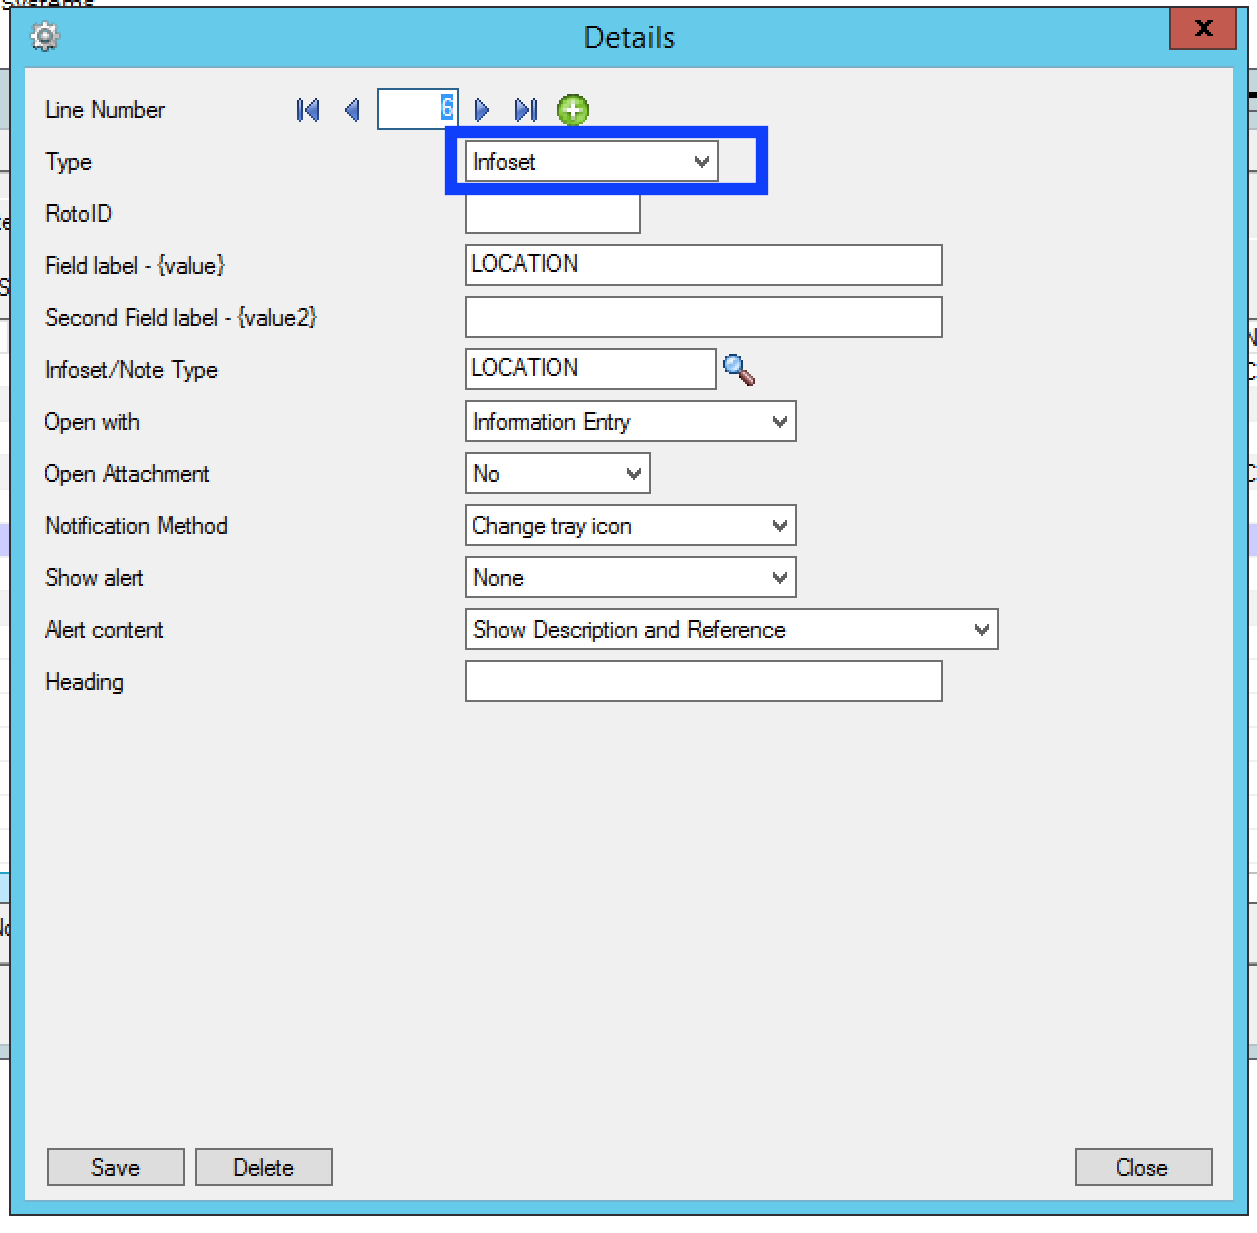
Example with one Field - LOCATION

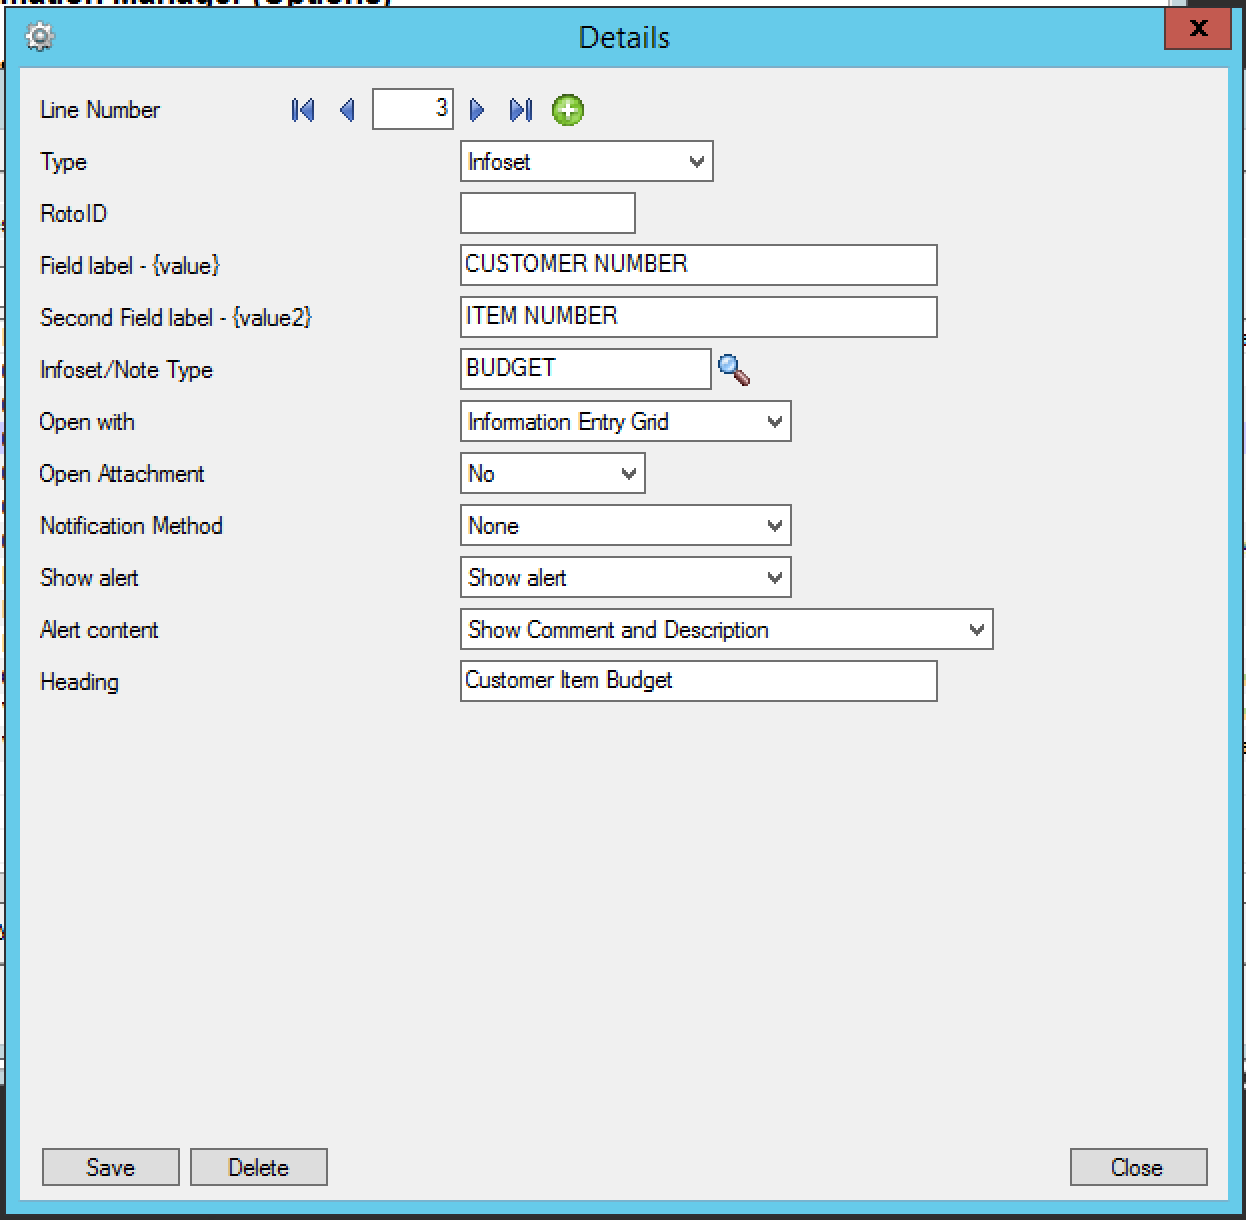
Example with Customer Number and Item Number

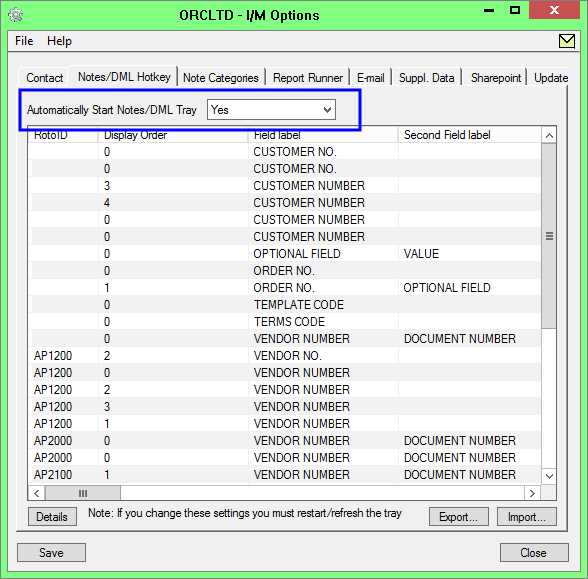
Select "Yes" for the "Automatically Start Notes/DML Tray" option
The Tray will automatically start for all Sage 300 users, using their currently logged on credentials.
In order for Notes or Documents to be displayed for the user, the tray icon needs to be running while the user is active in Sage 300 .
Note: Individual Users can overwrite the Notes setup in the IM Transactions / Notes User Options. See details in Notes/DML/Extender User Options

Enter a number from zero to 9999 to indicate the display order for this note. If you have two or more notes configured around the same screen then the notes will be displayed in this order where zero is first, one is second, etc.
Display Order is updated in the Grid view (and not the Details View).
Select from
-
Note if you require alerts based on unstructured data, ie a free format text box as long as you want. (IM –Notes module only)
-
Infoset if you require alerts based on structured data, ie a list of optional field values. (IM – Supplementary Data module only)
-
Network Folder if you require alerts based on a list of files in a nominated network folder. (IM – Document Management Link only)
-
SharePoint if you require alerts based on a list of files in a nominated SharePoint folder. (IM – Document Management Link only)
- Extender Script if you want to run an Extender script to generate content for the Note Alert Box (requires Orchid Extender module).
Configure which Sage 300 Fields/Screens display the Optional Table/Infoset content in the Alert Box.
RotoID - unique id for each screen - Optional
RotoID is the Sage 300 unique screen ID for the Desktop screen. You only need to enter it if you want to restrict the Document/Notes to one particular Sage 300 Screen.
Leave the RotoID field blank If you want the note / Document to trigger for all Sage 300 forms which have the Field label specified. The alert will show as per its configuration.
Example: For example, if you want Vendor Invoices only to show on the Vendor Activity screen, you would fill in the RotoID of AP1500.
For details on finding the RotoID, refer to How to find the RotoID of a Sage 300 screen
Enter the field label from the Sage 300 screen which is to trigger the display of the Optional Table - Infoset icons.
If the Field Label is entered with quotes, e.g. "PY", Information Manager will use the hard coded value in addition to the value set in the Second Field Label.
1. The same field may have different labels on different screens. See Example 1 below
2. The same field label may be used on the Header and Grid component of the same screen. See Example 2 below. Adding "F."to the field label forces it to use the field control and "G." forces it to use the grid control.
1. In AR Receipt Entry there are two Document Number fields - one on the header and one in the grid. To force the tray to use the correct one, you should use "F.DOCUMENT NUMBER" for the screen label or "G.DOCUMENT NUMBER" for the grid field label. .
2. If you want the same list of documents to show on both the AR Customer Screen and the AR Customer Inquiry, you need to add two rows in the IM Setup\Options on the Notes/DML/Extender Tray tab. One for the Field Label “CUSTOMER NUMBER” and one for the Field Label “CUSTOMER NO.”
Enter the second field label from the Sage 300 screen which is to trigger the display of the Optional Table - Infoset icons. If entered, then the document list will displayed for Field 1 = Field label and Field 2 = Second Field Label.
Second Field Label is optional and is configured in the same manner as the Field Label.
Infosets allow you to add and display structured data in the Sage 300 screens, enabling you to add Optional Fields to any Sage 300 screens.
Select the required InfoSet which holds the definition of the required optional fields for the notes.
Infosets are created inOptional Tables - Infoset Codes Setup Overview (Infoset Type)
Only applies if you have selected InfoSet in the NoteType field
When you click “edit” to insert/amend an existing InfoSet note you can optionally open the Information Entry screen or Information Entry Grid screen to do your editing.
If you are storing multiple records against one key combination (for example budget records) then select “Information Entry Grid” Screen.
If you are storing a single record per key combination (for example you have an InfoSet to store the link to the item picture), then select “Information Entry” Screen
Applies to InfoSet notes only.
Applies to InfoSet notes only. Select Yes or No to open an attachment linked to the configured InfoSet Note.
You can only store one document against each infoset record. It can be set to auto open in the alert box – but then it always opens. If you do not auto open you need to click “edit” on the Alert box, and then you need to click F6 to open the document.
Configure how the Notes will be displayed in the Alert Tray.
This option refers to the Information Manager Tray icon in the System Tray.
It is configured in I/M Setup > I/M Options > Notes/DML/Extender Tray Tab.
Select one of the following notification methods for the user to be notified if a note exists :
-
None – Choose if you want to use the alert box only
-
Change Tray Icon – to force the tray icon to go red if notes exist for the screen.
If there are any notes in the system relating to the open screen will display as
-
Blink Tray Icon – to force the tray icon to go red and blink if notes exist for the screen
-
Automatically pop up - to force the entry screen to open automatically . When used with an Info-set Note type, Open the associated data entry screen “Information Entry Grid” or “Information Entry” screen as configured in the “Open With Column”.
Note: If the note/document is not configured to Automatically Popup, you can use the Hotkey (F11 by default) to bring up the Alert Box to view / add notes and documents for the field/screen selected.
Refresh the Tray icon if you have made any changes on the IM Setup>Options in the current session as the Tray icon reads the current setup when the company is first opened.

Tip: If you have multiple Tray icons, Close the Sage 300 desktop and re-open to refresh the configuration.
