Workflows can be configured to approve new records, approve field changes in Sage 300 or start automatically a series of actions to alert users when something happens in Sage 300.
The latest release of Extender includes standard Workflow Templates that use Workflow Rules to determine who approves what records.
Note: For a list of standard workflow modules, refer to: Standard Workflow Modules
The steps below explain how to implement the default workflow templates in your Sage 300 database.
Before you start
Step 1: Draw a diagram of the workflow you require.
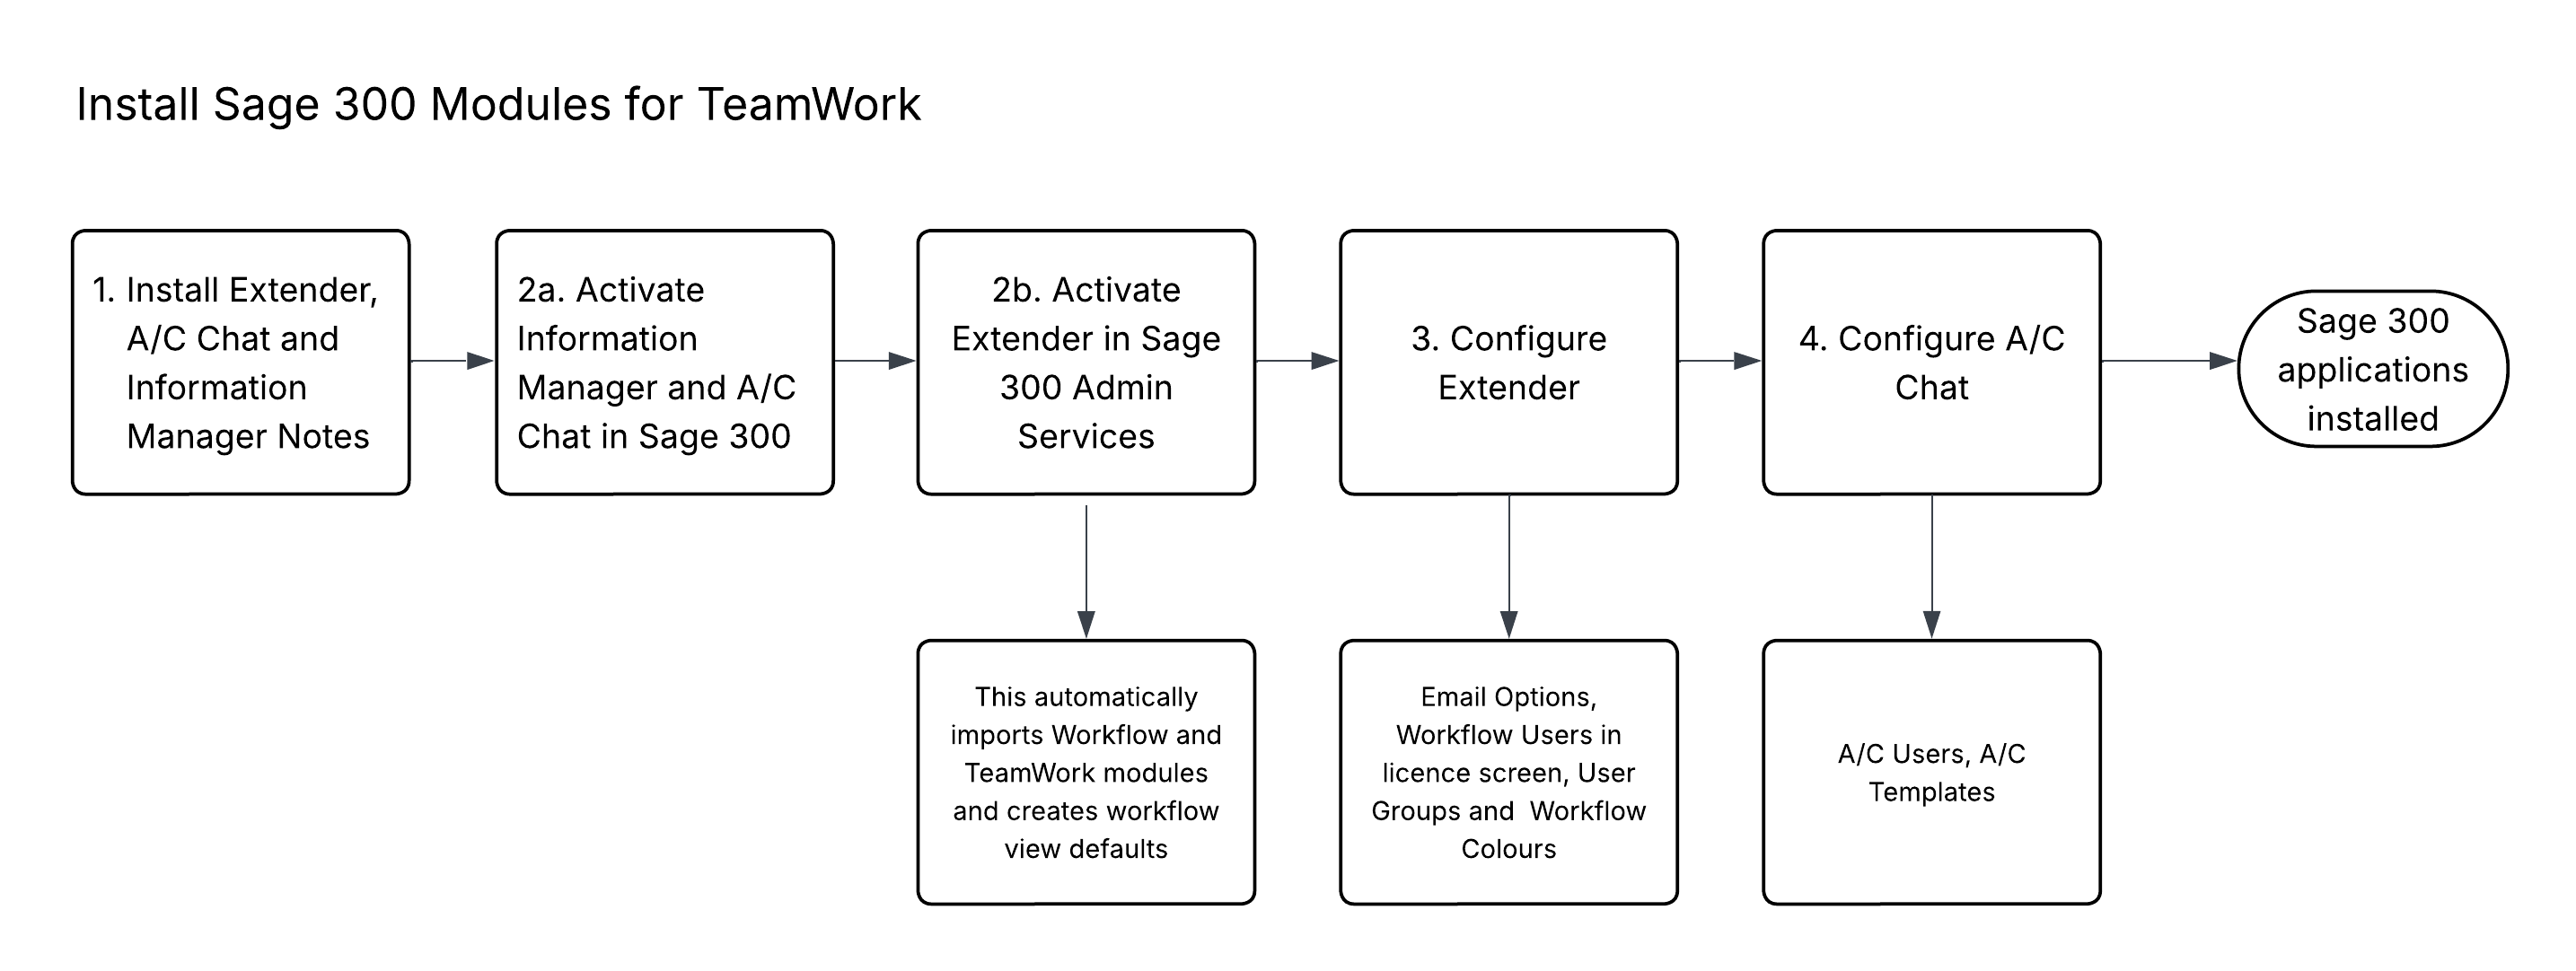
Step 2: Install and activate Extender in Sage 300 > Administrative Services.
Step 3: Restart the Sage desktop.
Note: Activating Extender imports the Workflow and the TeamWork Extender modules automatically. This adds workflow actions in Extender scripts for use in workflow templates.
Note: Importing the workflow module creates default records in Workflow View Defaults for Sage 300 modules (views) active in the database at the time of activation. See Workflow View Defaults
Configure Extender
Step 1: Adding Security for Extender in Sage 300 Administrative Services.
Step 2: If you want the workflow to send emails, configure Extender Options to email . Refer to Options
Step 3: Configure Workflow Users. Refer to Extender License and Workflow Users
Step 4: Create Workflow User Groups
Step 5: Add Workflow colors
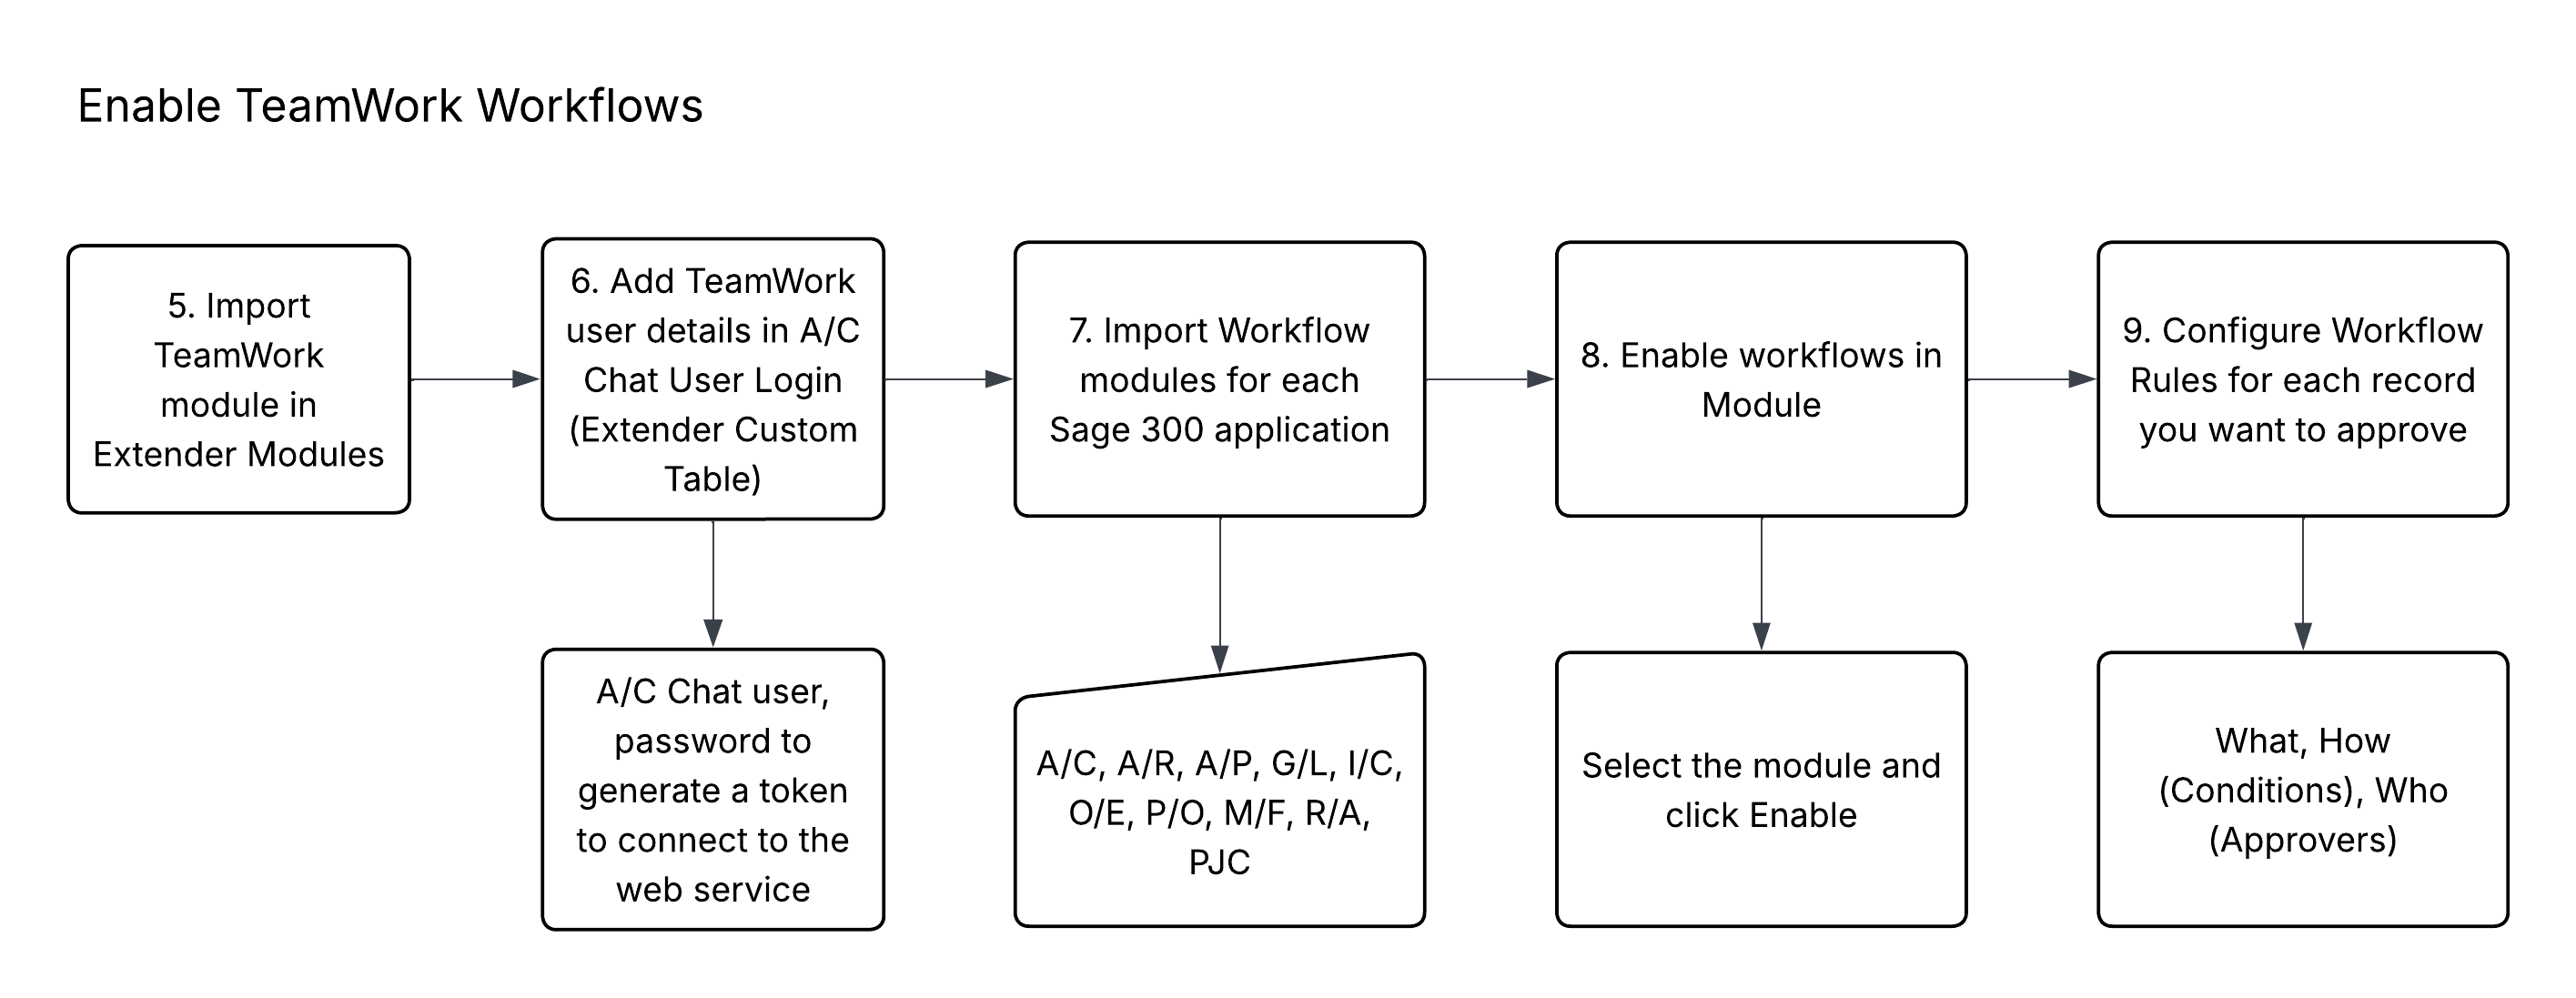
Import Workflow Modules
Import the relevant Extender module(s)
You can import from the Extender Modules screen, using the Available Modules tab if displayed or the Modules Tab. See Extender Modules
Step 1: Import the module from the VIXXA folder. (e.g. GLWORKFLOW.vi in the VIXXA folder for version 2026).
Step 2: Enable the module: You can then view the details in the Modules Tab and use the Enable button to enable the workflows.
Note: This activates the workflow template in View Events, Scripts and Workflow for the selected view (Sage 300 record).
Import and enable the GL Workflow module

Configure workflow rules
All modules contain a default workflow rule to link the workflow template to the required Sage 300 view. With the default rule enabled, all records need to be approved by the ADMIN user.
For example, after importing and enabling the GLWORKFLOW module, all G/L Batches will need to be approved by ADMIN before they can be made ready to post and posted.
See details: Workflow Rules
Step 1: Update default workflow rules by adding your workflow conditions and selecting approvers.
Step 2: On the Options Tab, select the notifications methods (send Email and/or send A/C Chat messages) and whether to autopost when the workflow is approved:
Step 3: Optionally,
-
Update message templates
-
Add workflow colors for use in Workflow Rules
-
Setup groups and use them as Approvers in Workflow Rules.
Step 4: Restart the Sage desktop and test the workflow.
Detailed examples
The workflow tutorials document the detailed steps for the most commonly used workflow templates:
Description - Workflow template tutorial/example
Configure TeamWork
Step 1: If using TeamWork, see steps to install and configure AC Chat.How to Install TeamWork