Using EFT Processing - FAQ
Browse some common support questions relating to using EFT Processing for Sage Intacct.
Step 1: The Create AR Payments process will create one AR Payment per invoice selected on a one-to-one basis, using the Payment method, bank and Receipt date entered on the screen.
Tip: If you require the functionality to apply multiple AR Invoices and AR Credit Notes to the same AR Receipt - you need to use the inbuilt Sage Intacct "Receive a payment" screen to create AR Receipts a) applied to many invoices and b) applied to credit notes.
In Sage Intacct, you can only create AR Payments at the same entity level as the related AR Invoice.
If selected as Top Level, invoices listed to be applied are those created at top level. Likewise if you select a specific entity , only invoices created at that entity level are listed.
EFT Processing creates the AR Payment at the selected level (and the same as the AR Invoice level).
If a vendor is configured with an EFT File Format on the Orchid EFT Tab, completed payments for that vendor will appear on the EFT Payment Request screen if the payment method is selected in the EFT Bank setup.
For details, refer to:Selecting Payment Method
Note: If you can't see a payment on the EFT Payment Request screen, check the filters and check that the payment method on the AP Payment is selected for the bank and format record in EFT bank.
Saving an EFT File to a SFTP server
Why use SFTP?
EFT processing offers a reliable way to automate payments. Using SFTP (Secure File Transfer Protocol) can further enhance this process by removing a manual step to download the file before uploading it into the banking software. SFTP is an encrypted protocol that protects the confidentiality and integrity of data during file transfers.
How to setup SFTP?
Users can subscribe to Orchid's SFTP service. You can then configure EFT Banks to SFTP the file directly from the EFT File list.
Users can then generate an EFT File (for AP Payments, AR Payments or Employee Expenses payments). On the EFT File list, users with the necessary permissions can upload to SFTP directly instead of downloading the file to their browser.
For details, see Upload EFT files to SFTP
The Create AR Payments screen displays all approved AR Invoices.
The EFT Spotlight video demonstrates how to create AR Payments for a range of invoices using Orchid EFT Processing for Sage Intacct.
Spotlight Video: Creating AR Payments with Orchid EFT Processing in Sage Intacct
View on the EFT File list allows you to see all the payment records included in the file.
Always activeYou can use the action to check the details before uploading the file to the bank or to review completed files.
The EFT Quick Tip video presents an overview and tips on using filters in EFT Processing for Sage Intacct.
This applies to the following Orchid EFT Processing screens to select records and to view EFT Files.
-
EFT File List
-
AP Payment Request
-
AR Payment Request
-
Employee Expense Payment Request
-
Create AR Payment
Clearing filters on one column
To clear a filter on one field only, select the icon next to the column name and choose Clear.
![]()
How does it work?
When you create an EFT File for a bank configured for SFTP using Orchid's EFT Processing with a SFTP licence, the file is automatically uploaded to the configured Site instead of downloaded in the browser.
EFT Processing supports SFTP with Key file and SFTP with a username and password. You can use both if your bank's FTP uses 2 factor authentication.
EFT Processing includes the option to upload EFT files directly to SFTP.
PROCESSING POSITIVE PAY FILES
The setup and process is very similar for Positive Pay files and for standard EFT Files.
Step 1: Configure the appropriate bank in EFT Banks to be linked to the positive pay EFT File Format.
Step 2: On the Orchid EFT Tab for the Vendor, select the required Positive Pay format.
Step 3: Create, approve, print, and post the required Check payments.
Step 4: When you have a Printed Check payments in your AP Posted Payment list, Use EFT AP Payment Request to select the payments required and Generate an EFT File
Step 5: Use EFT File List to download the EFT File
Step 6: Upload the EFT File to the bank, and when confirmed by the bank, click Confirm on the EFT File List.
Creating a prenote file
Prenote (prenotification) is a process that creates a zero-dollar transaction (prenote transaction type) file for the bank as a test that the vendor's and employee's EFT details are setup correctly. The ACH prenote file can be generated in one of two ways, depending on how you control the process:
-
Control the process from the EFT Vendor(s) record - Method 1
-
Control the process from the EFT Bank record - Method 2
The EFT Spotlight video demonstrates how to create prenote ACH files using Orchid EFT Processing for Sage Intacct.
EFT Spotlight Video: Creating ACH prenotes in Sage Intacct
Active Filters
There are indications on the screens that filters are active.
-
The Filter icon next to the column name is filled in. The icon is only an outline if there are no filters for the column.
-
On the Advanced Filter icon, you can see the number of active filters
Clearing filters
-
To clear a filter on one field only, select the icon next to the column name and choose Clear.
-
To view all filters and clear them (or modify a few filters on one screen), use the Advanced Filters icon on the top right of the screen.
Default filters
-
The screen filters to 1 month ago by default.
-
Filters are saved from a prior session in the browser.
Fields available to filter by:
-
You can filter by any fields on the first row, by selecting from the list of values or using a filter string.
-
You can filter by any fields on the screen using the filter icon next to the column or add filters using the Advanced Filter button on the top right of the screen.
-
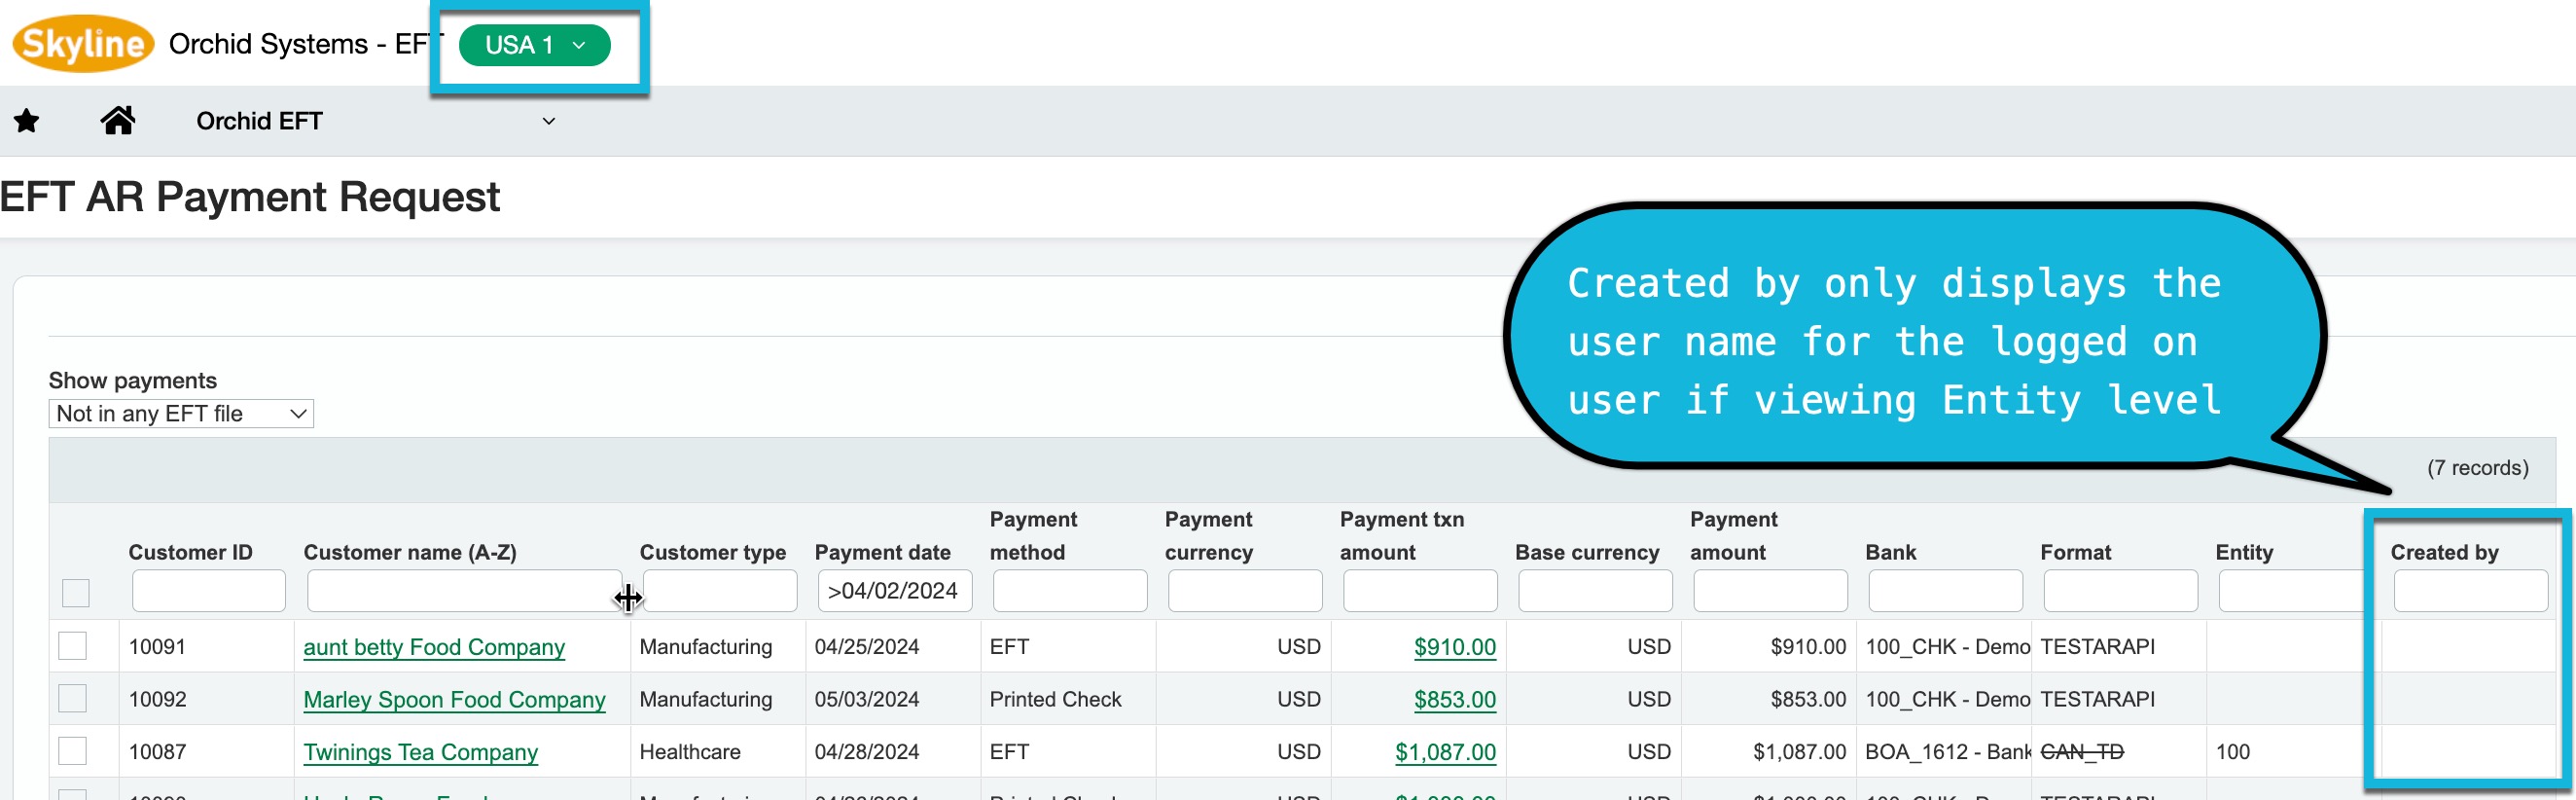
Vendor/Customer/Employee Types and Payment Created by are available to use as filters.
When working at Entity Level in Sage Intacct
If working in Sage Intacct at the Entity Level, the only shows the user name for payments created by the logged on user. The payment is displayed in the list, but the field is blank.
If you have security rights at the top level, you can view and filter by the name for all users.
If there is no Save button on the top right of the screen, check and resave the Sage Intacct permissions on the Orchid EFT objects.
For details, refer to:Troubleshooting Installation
Hold updates the EFT file status to on the EFT File list.
For example if the file is rejected by the bank, you can set the file to on-hold, update the relevant details, refresh the file and download again.
Only available if the status is New or Exported.
Step 1: Install the Cloud Service application on the workstation to map to the cloud service platform
Step 2: Configure the cloud service tool (e.g. Google Drive) on the appropriate workstation
Step 3: Configure the "downloads" directory for the required browser profile to be the EFT File Folder (e.g. using Microsoft Edge)
Step 4: Use the EFT Profile to log on to Sage Intacct
Step 5: When you download the EFT File using the EFT Profile, the file will automatically be saved on the cloud service drive.
Step 6: The Cloud service application will sync the file to the Cloud Service platform, using the Cloud Service platform security settings.
The EFT Quick Tip video demonstrates using EFT Processing with Cloud Services and the setup required.
Quick Tip Video: Using Cloud Services with EFT Processing for Sage Intacct
View Payments included in an EFT File
Select Included in an EFT File in the field on the screen to view and search for payments included in an EFT File.
This shows the payment details, including the File ID where the payment is included.
To view file details, select the File Id and search for it in the EFT Files. Refer to EFT File List
Select Included in an EFT File in the field on the screen to view customer payments included in an EFT File.
Change the date filter to match the payments you are looking for.
This shows the customer payment details, including the EFT File where the payment is included.
Select Included in an EFT File in the field on the screen to view payments included in an EFT File.
You can configure EFT Processing to validate:
-
Field size: minimum and maximum length of EFT details.
-
Valid values: ability to add a list of valid values for certain fields.
The EFT Quick Tip video demonstrates examples of validating fields in Orchid's EFT Processing for Sage Intacct
Quick Tip Video: Validating Orchid EFT Fields in Sage Intacct
You can update the Effective Date of the transaction if your bank file format supports sending a file in advance.
In the format, the DetailAP date would be [EffectiveDate]
e.g. [EffectiveDate:DDMMYY] including the date formatting

You can resize column width to fit your data.
Move the cursor on the top line, between two column labels and drag to change the size.
Tip: Column sizes are saved from a prior session in the browser.

You need to create the AP Payments using the standard Sage Intacct processes. EFT Processing can include completed posted payments for any payment methods (Record Transfers, Checks/Cheques, cash and Advances).
The AP Payment Request screen shows AP payments and advances that have already been entered, approved, and completed in Sage IntacctAccounts Payable.
Only payments that meet the following conditions are included:
-
The Vendor has an EFT File Format set up on the Orchid EFT tab
-
An EFT Bank record must exist:
-
of type “payment”,
-
match the bank used for the payment, and
-
match the EFT File Format set on the Vendor’s Orchid EFT tab.
-
-
The payment method is enabled on the EFT bank record for the bank , the EFT File Format and payment type.
A payment won’t show up in the AP Payment Request screen if the system can’t find a matching EFT Bank setup. In earlier versions, the payment showed up, but the format was crossed out.
Payments made using Credit Card or Savings bank accounts are not shown.
On the EFT File List screen, you can download or upload EFT Files.
If you have an active subscription for the SFTP service, you can configure the EFT Bank to upload directly to SFTP.
For details, refer to:Upload EFT files to SFTP
If you don't have an SFTP subscription or you choose Download destination type in EFT Bank, the files are downloaded on your local machine, based on your browser's configuration.
If the browser is configured to prompt for a file location for each download, Download in EFT Processing will prompt the user.
If you can't see all the payments you expect, the most common reason is that the filter on the screen is hiding the payments you are looking for.
By default, the screen displays only payments due in the last month. To view older payments, change the filter.
If payments do not appear on the AR Payment Request screen, and you have cleared and checked the filters, check the Customer's Orchid EFT tab and EFT bank records
-
Is the AR Payment approved and completed in Sage Intacct?
-
Is there an EFT Bank record of type receipt for the bank used in the payment and the EFT file format configured on the Customer's Orchid EFT Tab ?
-
Is the payment method enabled for EFT Processing on the EFT Bank record?
-
Is the EFT File Format set on the Orchid EFT Tab for the Customer?
The FSN field on the EFT Bank is next sequence number (the one that is going to be used for the next EFT Run).
The File Sequence Number is updated when you
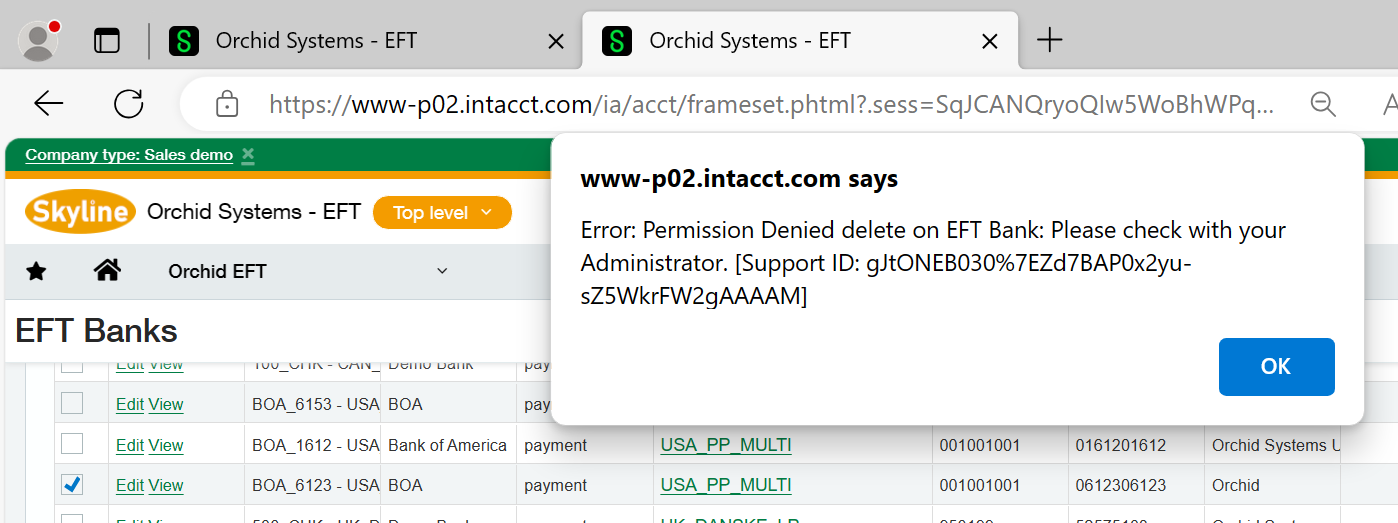
Users who Generate the EFT File need to have security rights to update EFT Bank as the FSN is stored on the EFT Bank record.
If a user doesn't have rights to EFT Banks and uses a file format that requires FSN, they may get an error message like below:
Warning! Permission Denied delete on EFT Bank. Please check with your administrator.
Tip: If you need to reexport a file, set the file sequence number back by 1 to generate the file with the same number.