Configuration Tips for Notes and DML Web Screens
The configuration steps for Notes and Document Management Link in I/M Options are similar when using the Sage 300 Desktop and web screens.
For details on configuring Notes and DML for Sage 300 Desktop Screens, refer to Configure Notes and DML Options
This section highlights some of the differences.
In this section:
Before you configure Notes and DML
This section assumes that you have installed and configured the Information Manager Web Tray
For details Refer to Install I/M Notes and DML Web Screens Key Steps
Field labels
Document Management Link and Notes rely on the field labels to display records.
The field labels may be different on the desktop screens and the web screens. If you are using both, you need to add separate configuration records for the Desktop Screens and the Web Screens.
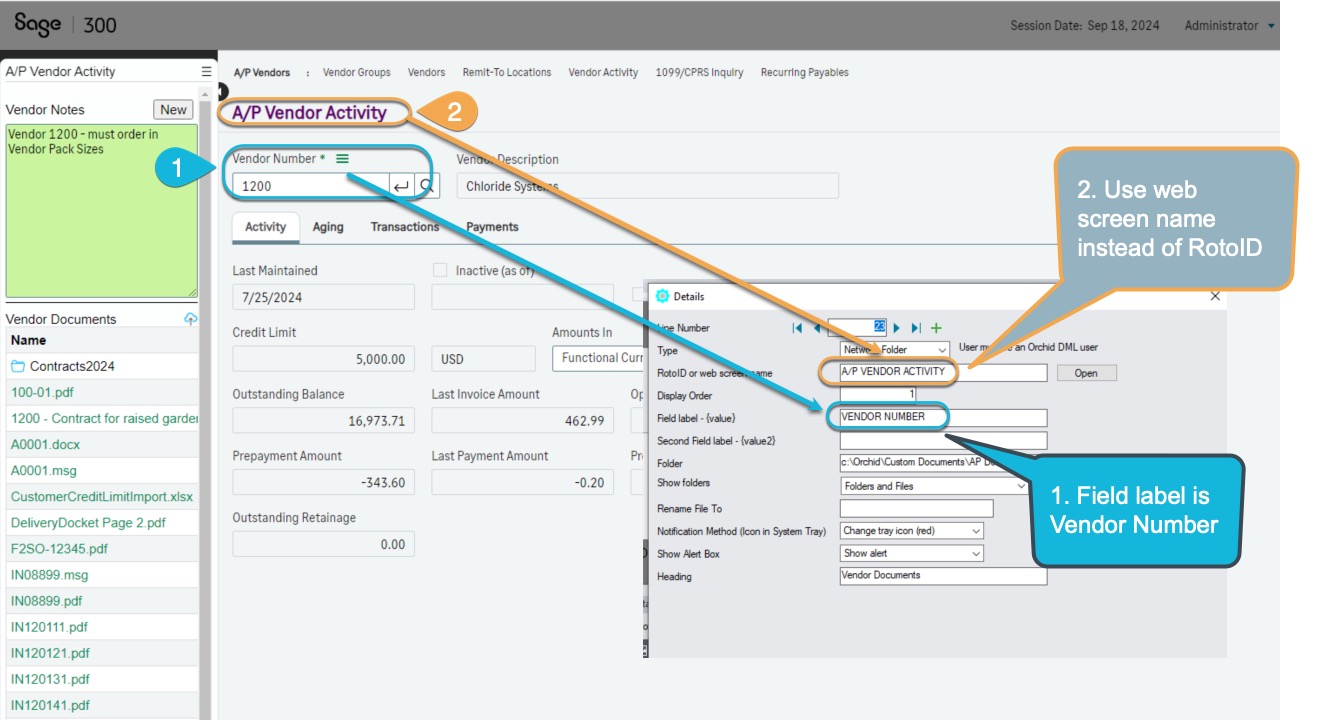
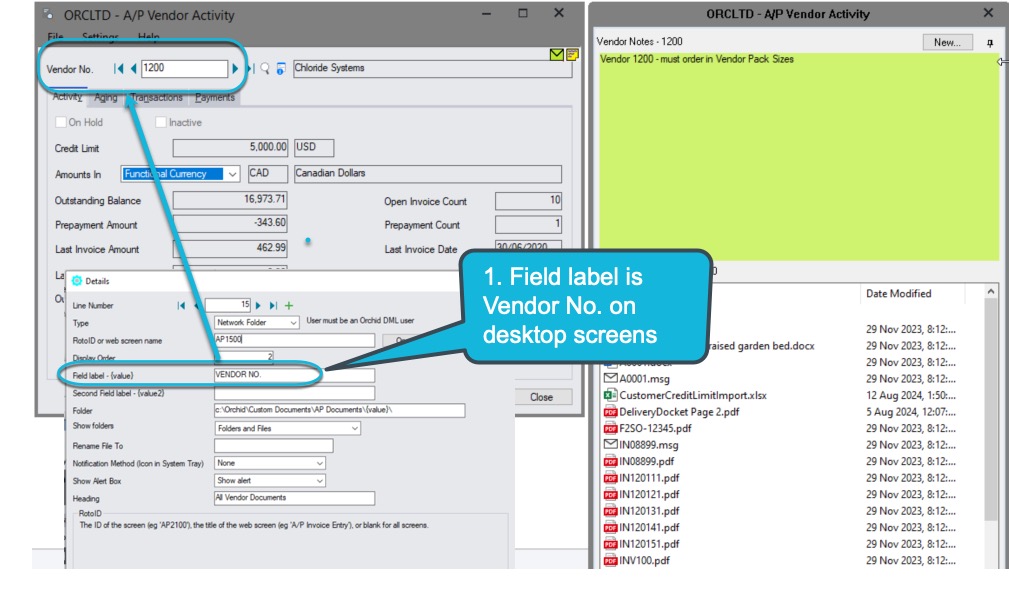
A/P Vendor Activity screen
On the web screens, the field label is and it is on the Desktop Screens.
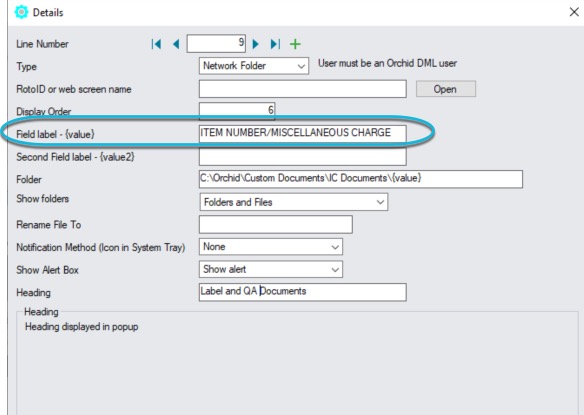
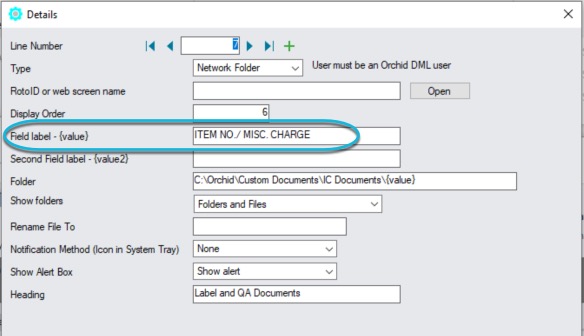
Item on O/E Order Entry line
To display notes based on the Item column in the O/E Order Entry detail line.
On the web screens, the column label is and it is on the Desktop Screens.
You need separate configuration rows:
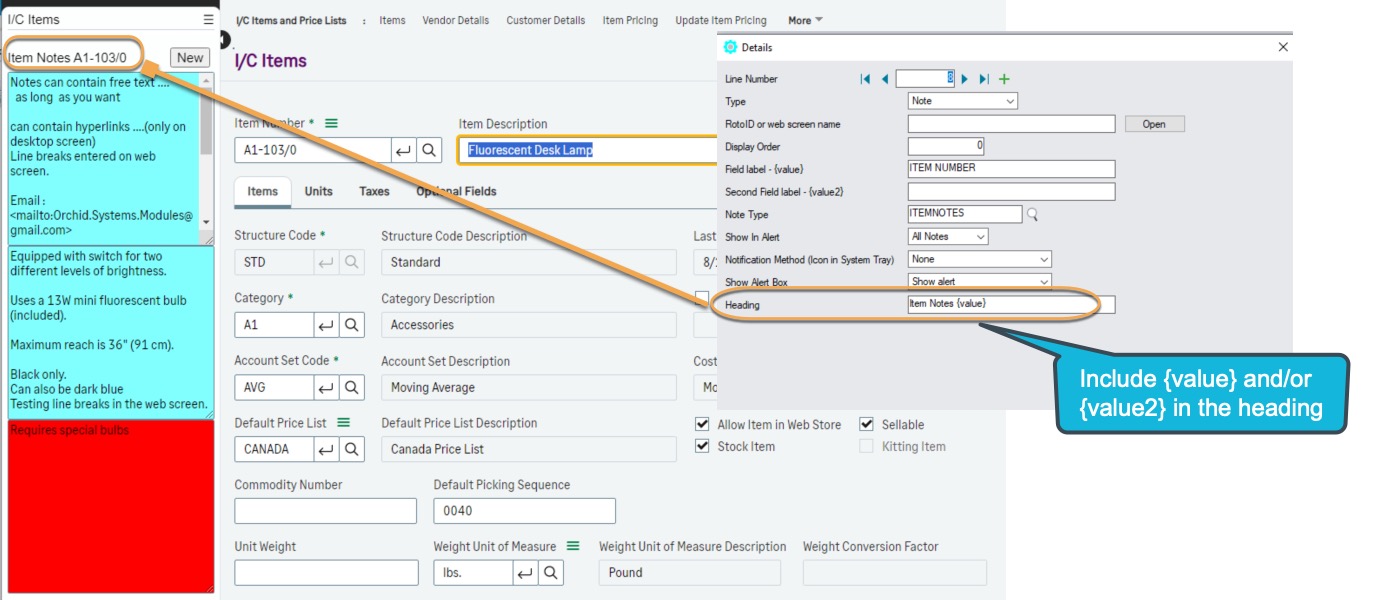
Record value in the heading
By default, the key values (e.g. the Vendor code or Document Number) do not show in the heading when using the Web Tray as the tray cannot be seen independently of the underlying web screen for the selected record.
If you want it display in the Web Tray, include {value} or {value2} in the heading in I/M Options.
A/P Vendor {value} Documents in the will show when viewing Vendor 1200 on the web screens.
Set the to Item Notes {value} to display the Item Number in the Web Tray heading for notes linked to the Item Number field. The heading will display Notes for item A1-103/0 for item number A1-103/0
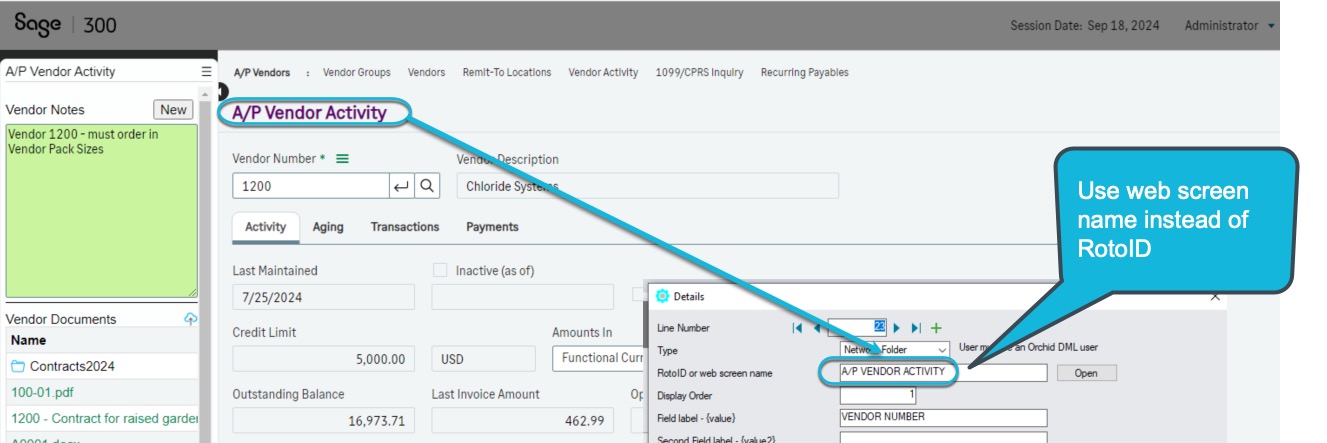
RotoID and setting configuration by screen
If the RotoID field is blank then the configuration in I/M Options applies to both desktop and web screens (provided the field names are on the screens).
The webscreens don't have RotoID values. If you want to restrict Notes and Documents to certain screens, you need to use the web screen name.
The configuration in Notes/DML/Extender Tray applies to the desktop screen with the RotoID, or the web screen with the name entered in the field.
For the A/P Invoice Entry screen, the RotoID on the desktop screen is AP2100. On the web screen, use A/P Invoice Entry if you want to display documents/notes only for the A/P Vendor Activity.
If another screen has a field labeled Vendor Number, the Documents will not be displayed.
For the Customer screen use A/R Customers (RotoID AR1300 for the desktop screen)

Importing I/M Options configuration
When importing records in I/M Options, use the field for the RotoID of the desktop screens, use the field to import the web screen name.
Notes are Text only on the web tray
On the Sage 300 desktop screens, you can include pictures in Notes and format the Notes by copying and pasting from Microsoft Word.
Such content is not displayed on the web screens. The Web Tray only displays the text version of the notes.
If you are using both Sage 300 desktop and web screens, it is recommended to include only text in the Notes.
If you include formatting or pictures in a Note on the desktop and edit the note on the Web Tray, the formatting or picture will be removed from the note.
If you need to link pictures to records in Sage 300, it is recommended to use Document Management Link.
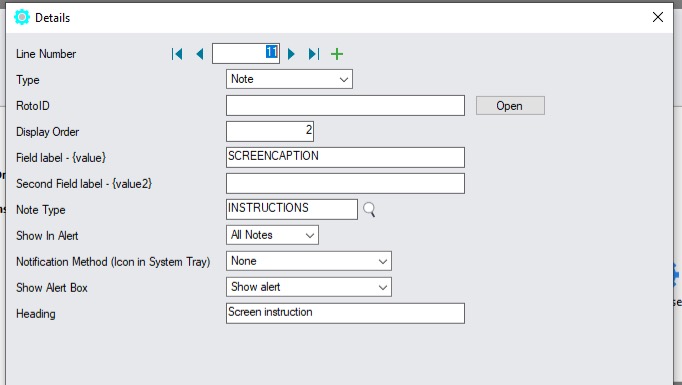
Screen Instruction Notes
To add a Note that appears whenever you open a particular Sage 300 web screen, you can use SCREENCAPTION as the .
You can then add Notes records, where the key is the Screen Caption.
To add screen instructions for the desktop screens, enter ROTOID in the .
You can create a Note Type called INSTRUCTIONS.
Add a record in I/M Options, enter SCREENCAPTION as the Field Label and select INSTRUCTIONS as the Note Type.
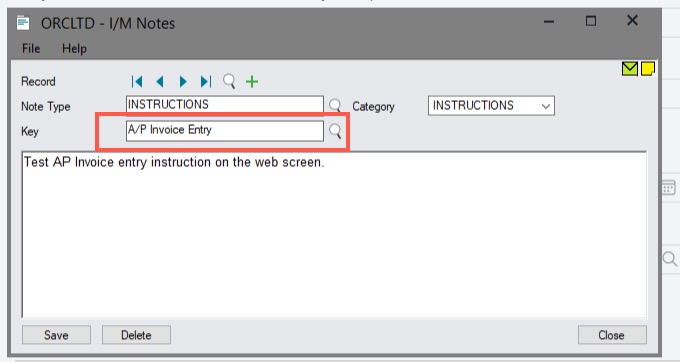
Open the A/P Invoice Entry screen on the web screen, open the Web Tray and add a new Note. (Select New instruction, Enter the details and Save).
The key will be set to A/P Invoice Entry automatically.
Next time you open the A/P Invoice Entry screen on the web screen, the Note will appear, before you select batches or vendors.
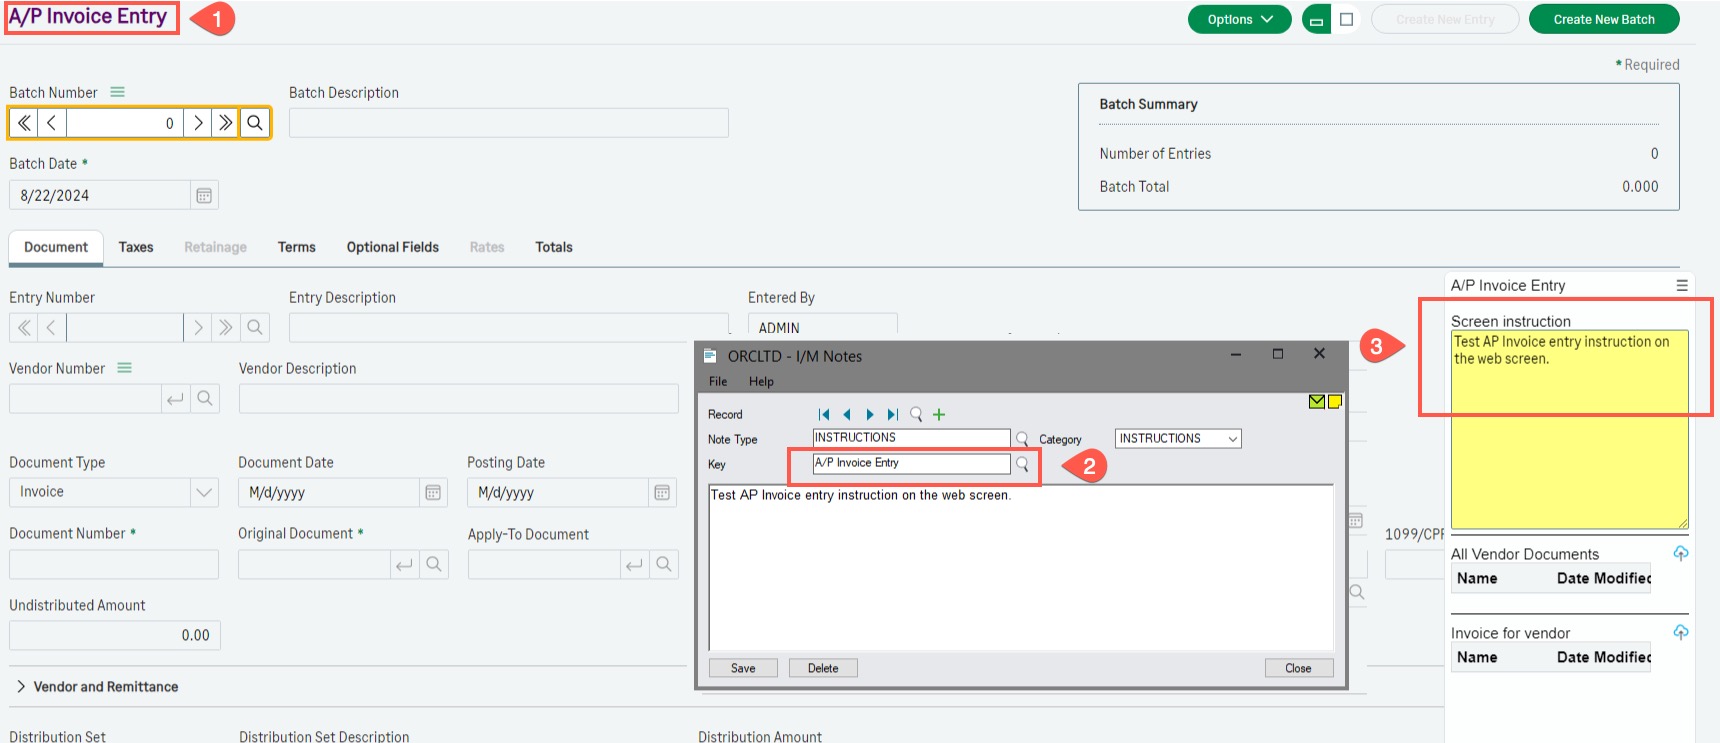
Alternatively, you can enter or import the Instructions Notes on the desktop.
Add a note for INSTRUCTIONS Note Type and enter the key as A/P Invoice Entry
Use the exact capitalization as on the Web Screens.