Workflow Rules: Conditions (How) setup
How does it work?
The fields you can use depend on the record type you want to approve. In the Sage 300 world, the record type is linked to a view.
|
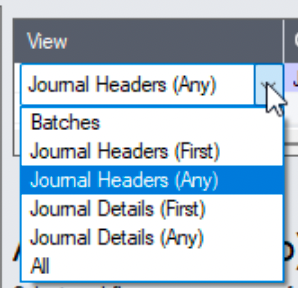
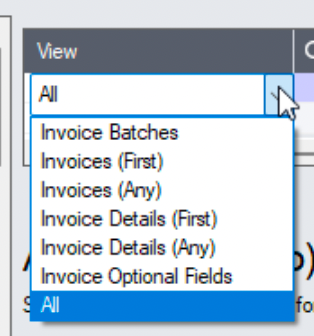
You can use fields from the batch, entries in the batch, details in entries, or the batch optional fields. You can choose the First or Any entry. |
|
| G/L Batch example |
|
| A/P Invoice batch example |
|
|
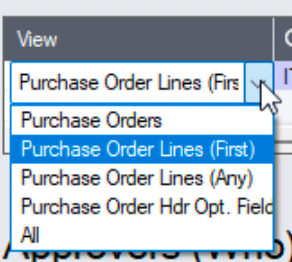
such as O/E Orders, P/O Purchase Orders, I/C Transactions |
You can use fields from the Header, details or the Header optional fields. |
|
|
|
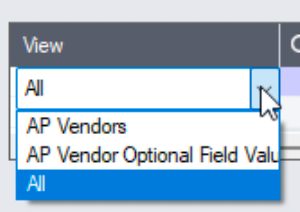
such as A/R Customers, A/P Vendors |
You can use any fields on the record or its optional fields if configured. |
|
|
Detailed field description
All
Use the All option for the view if you want to approve all records.
If All is included in the first rule (the rule with the lowest Evaluation order), then all records will follow the rule.
If All is not the first rule, All will mean all remaining records (all the records that don't meet the conditions in the prior rules).
Any vs First option
When selecting records based on a journal or entry in a batch, you can choose to use the First entry in the batch or Any entry in the batch.
Any entry or Any detail provides more flexibility in how users can enter the data. The workflow doesn't just rely on the first entry, but will start if the condition is found in any journal/entry/detail line.
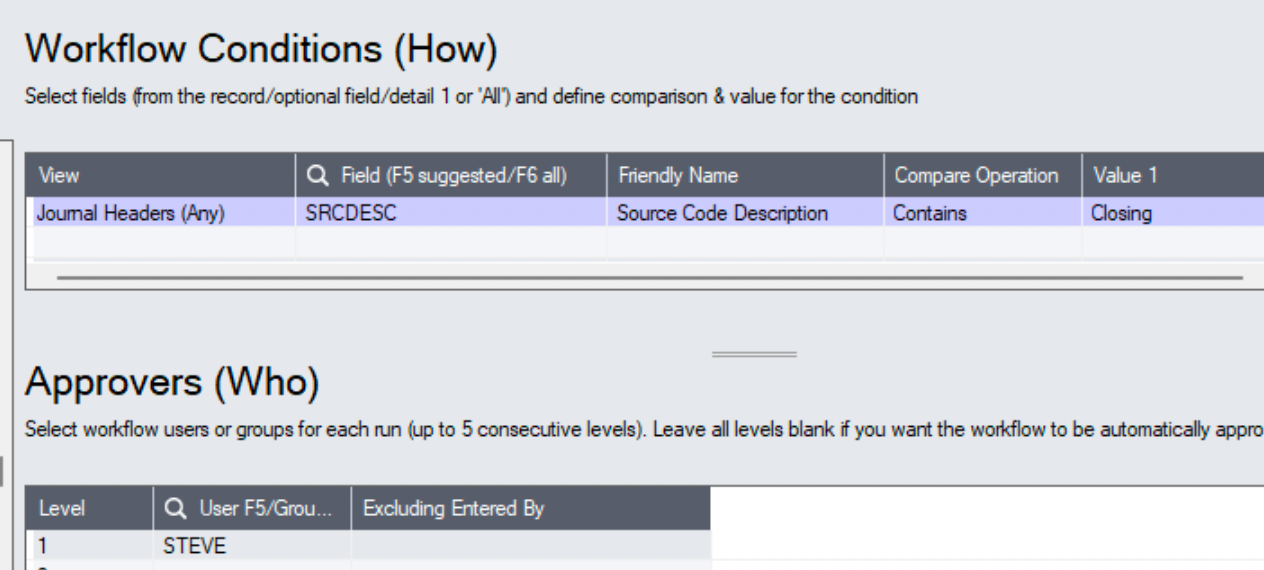
A company wants all closing entries to be approved by User A. Closing entries are determined by a source code GL-CL, where the source type description contains "Closing". You can setup the rule based on the source code or the source code description, depending on your Sage 300 setup.
In this scenario, we choose the source code description: If a G/L Batch includes journals where the source code description contains CLOSING, the workflow starts and User A must approve before the batch can be posted.
This will work whether the closing entry is in the first journal or a subsequent one.
Set the Workflow Conditions
View: Journal Headers (Any)
Field: SRCDESC (Source Code Description)
Operator: Contains
Value: Closing
Optional fields
You can use optional fields associated with the record you want to approve as a condition.
-
Use the Finder (or F5) to select an Optional Field added on Workflow View defaults.
-
F6 shows all the optional fields for the application, (in my case AR). You need to select an optional field configured for the right location.
You can add the optional fields you want to use in Workflow View Defaults to simplify the data entry.
If you have an optional field called UPSZONE configured for A/R Customers in A/R Setup, you can have different rules and approvers based on the value of the UPSZONE optional field.
Compare operation
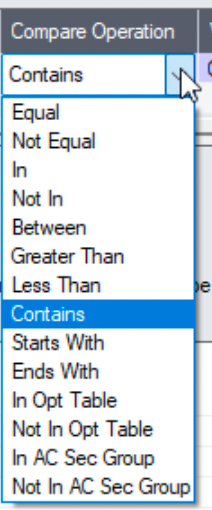
You can compare a field value to values configured in the rule.
Equal, Not Equal, Greater Than and Less Than requires one value
Between requires two values.
Depending on the comparison, one or two fields are enabled (value and value2).
Important! When comparing strings, all compare operations are Case Sensitive. Orchid and ORCHID are not equal.
In / Not In
Use a comma separated list of values.
If field is ENTEREDBY, the list could be UserA, UserB, UserC
If the user is in the list, set certain approvers.
If the user is not in the list, set other approvers
In Opt Table / Not in Opt Table
You can use a list of valid values configured in an optional table in Common Services.
This is useful for a long list, such as a list of countries, and when you want to use the list in Sage 300 optional fields as well.
If the value is one of the values in the optional table, set certain approvers.
If the value is not in the optional table, set other approvers.
This is demonstrated in the Purchase Order Approval example.
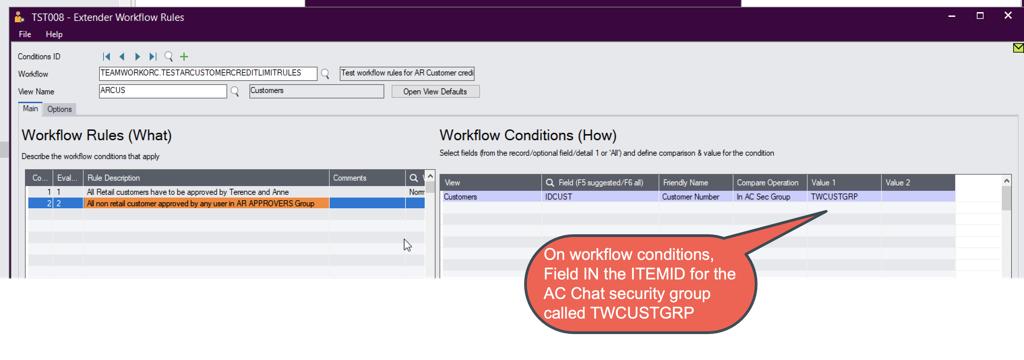
In AC Chat Sec Group/ Not in AC Chat Sec Group
You can use a list of valid values configured in A/C Chat > Users > Security Group.
This is only available if A/C Chat is activated in the database.
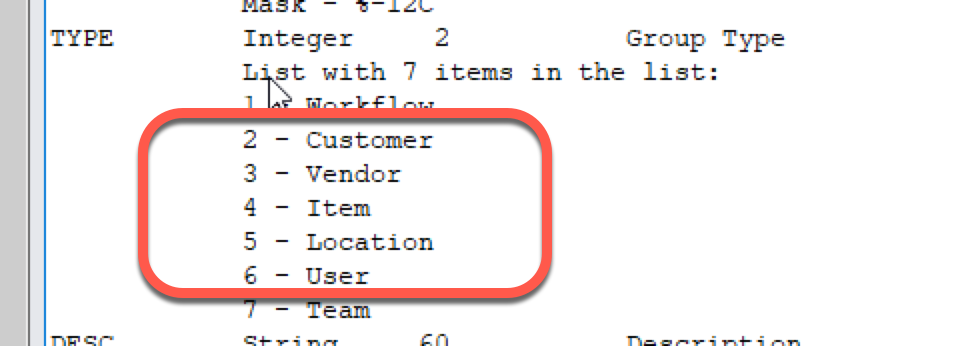
This condition requires two values: the AC Chat Group Name and the Group Type (2 for customer, 3 Vendor, 4 for Item, 5 for Location, 6 for Users).