Install EFT Processing Application
To get started with EFT Processing, you need to install the EFT Processing XML application.
Download the installation files
Installation files are available to Sage registered partners on the Orchid Systems website. Log on to the website with the partner details and navigate to Product downloads page.
What does the installation file include
The file includes custom fields and tables to store and display the information required to use EFT Processing.
For details on the custom objects created, refer to EFT Custom Objects
Choosing the installation file
There are two installation XML files available on the Orchid website. You only need to install one of the XML files.
The Orchid EFT menus are in the language of the installation program, regardless of the user's language preference.
-
To have the menus in English, install the English XML file.
-
To have the menus in French, install the French XML file.
Installing the French language translation
There is no special installation.
The XML installation package includes both English and French language preferences. The French language translation is installed when you import the package in Platform Services. You don't need a separate installation file for the translation.
Steps to install
Log in to Sage Intacct with security rights
The installing user needs security rights to Platform Services.
You can log in to Sage Intacct as an internal user or an external user to perform the installation.
Installing an update
If you have previously installed the Orchid application and need to install the latest update, you generally only require to perform steps 1 and 2 (install the application in Platform Services) and step 5 (restart the Sage Intacct session).
In some cases, you may need to reselect the EFT Roles and permissions.
Step 1. Go to Platform Services > Install Application
Unzip the downloaded file and save the Orchid_EFT.xml application file to your desktop.
In Sage Intacct, go to Platform Services > Install Application >
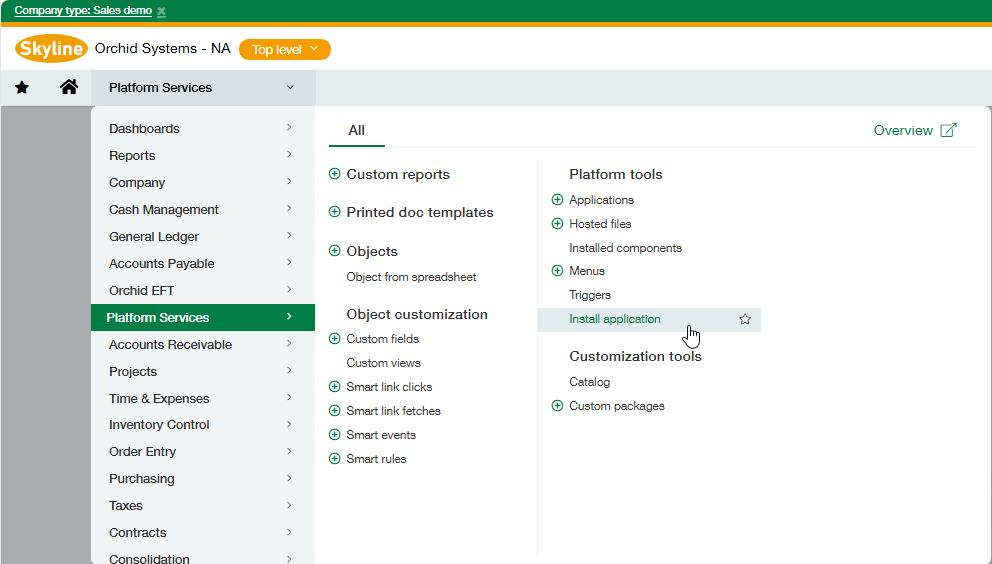
Tip: If you do not see Platform Services in the list of modules, ask the Sage Intacct Admistrator to Enable Platform Services in Company \ Admin \ Subscriptions
Note: You must not use Platform Services > Custom packages to install the ORCHID_EFT.XML file. If you receive an Internal error received / Uncaught exception error, check that you are using Platform Services > Install Application.
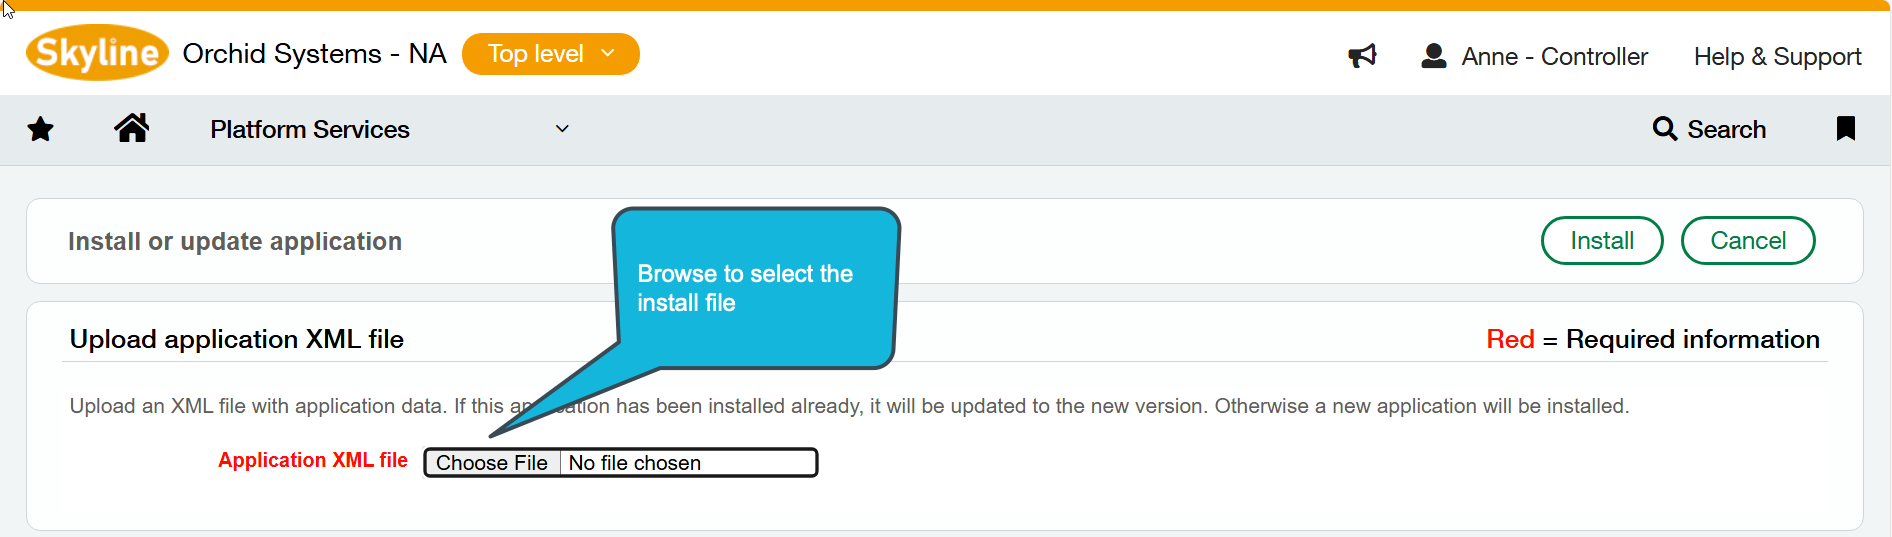
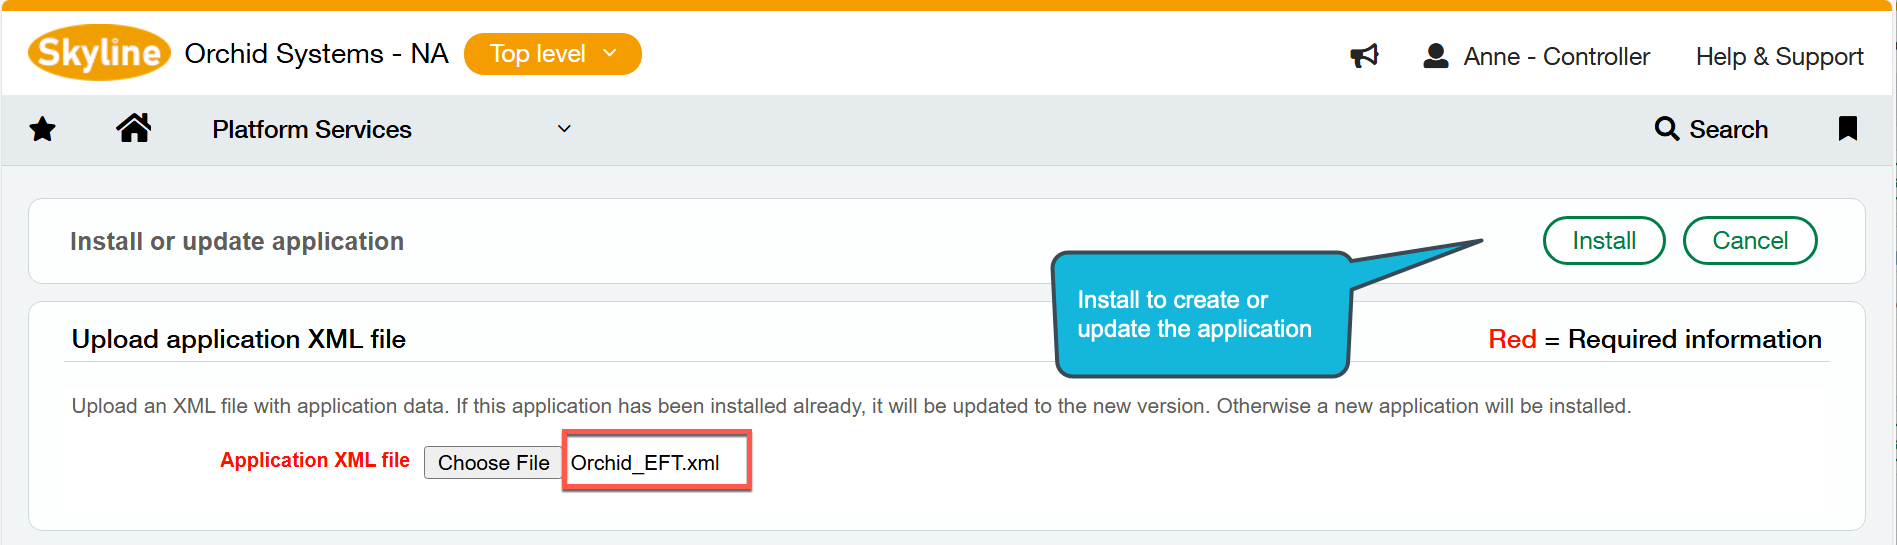
Step 2. Install the application
-
Select Install from XML
-
Choose the Orchid_EFT.xml file saved on your desktop
-
Click Install. The installation may take a few minutes to complete.
-
The import creates custom tables, menu items, custom screens and adds user-defined fields to AP Vendor, AR Customer and Time and Expenses Employees.
The following objects are created:
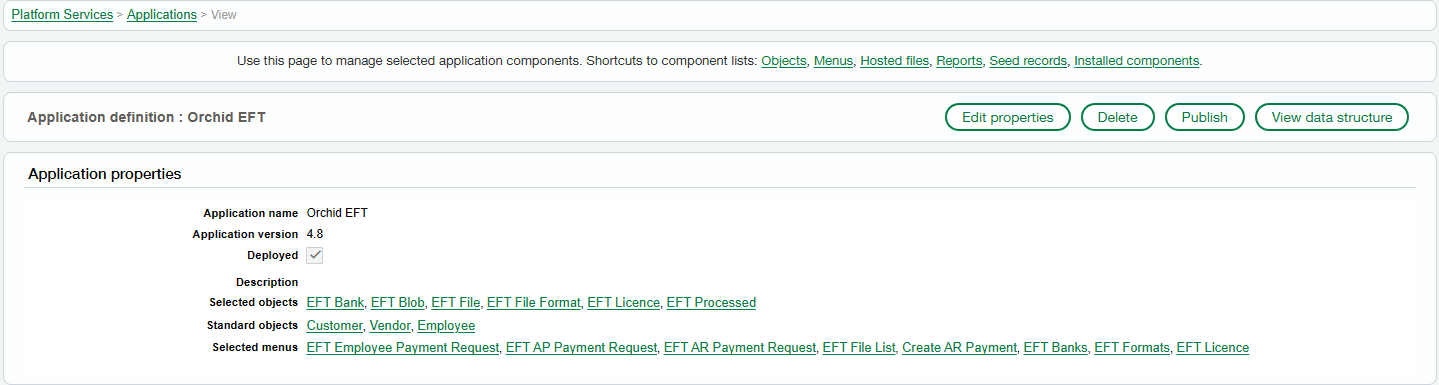
Tables
-
EFT Bank
-
EFT Blob
-
EFT File
-
EFT File Format
-
EFT Licence
-
EFT Processed
-
EFT Permissions
Menus Items and custom screens
-
EFT Employee Payment Requests
-
EFT AP Payment Requests
-
EFT AR Payment Requests
-
EFT File List
-
Create AR Payment
-
EFT Licence
-
EFT Permissions
User-Defined Fields (19 on each of AP Vendor, AR Customer and T&E Employee)
-
: Account Name, Account Number, Bank Name, BIC, Bank/Branch, Extra, Extra 1, Extra 10, Extra 2, Extra 3, Extra 4, Extra 5, Extra 6, Extra , Extra 8, Extra 9, IBAN, Payment Reference, EFT File Format
-
: Account Name, Account Number, Bank Name, BIC, Bank/Branch, Extra, Extra 1, Extra 10, Extra 2, Extra 3, Extra 4, Extra 5, Extra 6, Extra , Extra 8, Extra 9, IBAN, Payment Reference, EFT File Format
-
: Account Name, Account Number, Bank Name, BIC, Bank/Branch, Extra, Extra 1, Extra 10, Extra 2, Extra 3, Extra 4, Extra 5, Extra 6, Extra , Extra 8, Extra 9, IBAN, Payment Reference, EFT File Format

Step 3. Create Web Services Sender ID
Create the “Ajax” Web Services user
Select Company \ Setup \ Company from the Main Sage Intacct Menu
Select the Security Tab, scroll down to “Web Services authorizations” and insert the sender id “Ajax” if you do not already have one.


Step 4. Setup Roles and User Permissions
Detailed steps depend on whether you are importing the module as an External or an Internal User
Refer to Configure Security
Step 5. Refresh / Close and re-open
Close and re-open the Sage Intacct session after the 3 steps above have been completed.
You should now see the Orchid EFT Menu.
You can drag this menu to your required position (for example,. below Accounts Payable)
Step 6. EFT Overview
You can see the Orchid EFT objects in the Overview. In addition, EFT Processing adds extra fields to the Accounts Payable > Vendors / Suppliers, to the Accounts Receivable Customers and the Employee screens.
Important! Available features depend on your Licence code.
Tip: You can move the Orchid EFT Menu and add some menu options to your Favorites Menu using standard Sage Intacct functionality.

Troubleshooting Installation
You should be able to access all the options (e.g. EFT Banks)
| Issues | Solutions |
| No buttons e.g. “Add” or “Delete” | Check the Ajax Web Services User has been created |
| No Menu |
Check Permissions Restart the browser. In some cases, you may need to wait a little while for the new permissions to propagate. |
| Uncaught Error Exception when installing |
Check that you are using Platform Services > Install Application. You must not use Platform Services > Custom packages to install the ORCHID_EFT.XML file. |